Must-Have Budget Tripods for Night Skies
```html
The Importance of a Sturdy Tripod for Night Sky Photography
Capturing the night sky’s beauty—whether it’s the Milky Way, star trails, or meteor showers—requires more than just a camera with manual settings. Stability is non-negotiable. Even the slightest movement during long exposures can turn crisp stars into blurry streaks. A sturdy tripod isn’t just an accessory; it’s the backbone of astrophotography. Budget constraints shouldn’t force you to compromise on this essential tool, as several affordable options deliver the rigidity and reliability needed for sharp night shots.
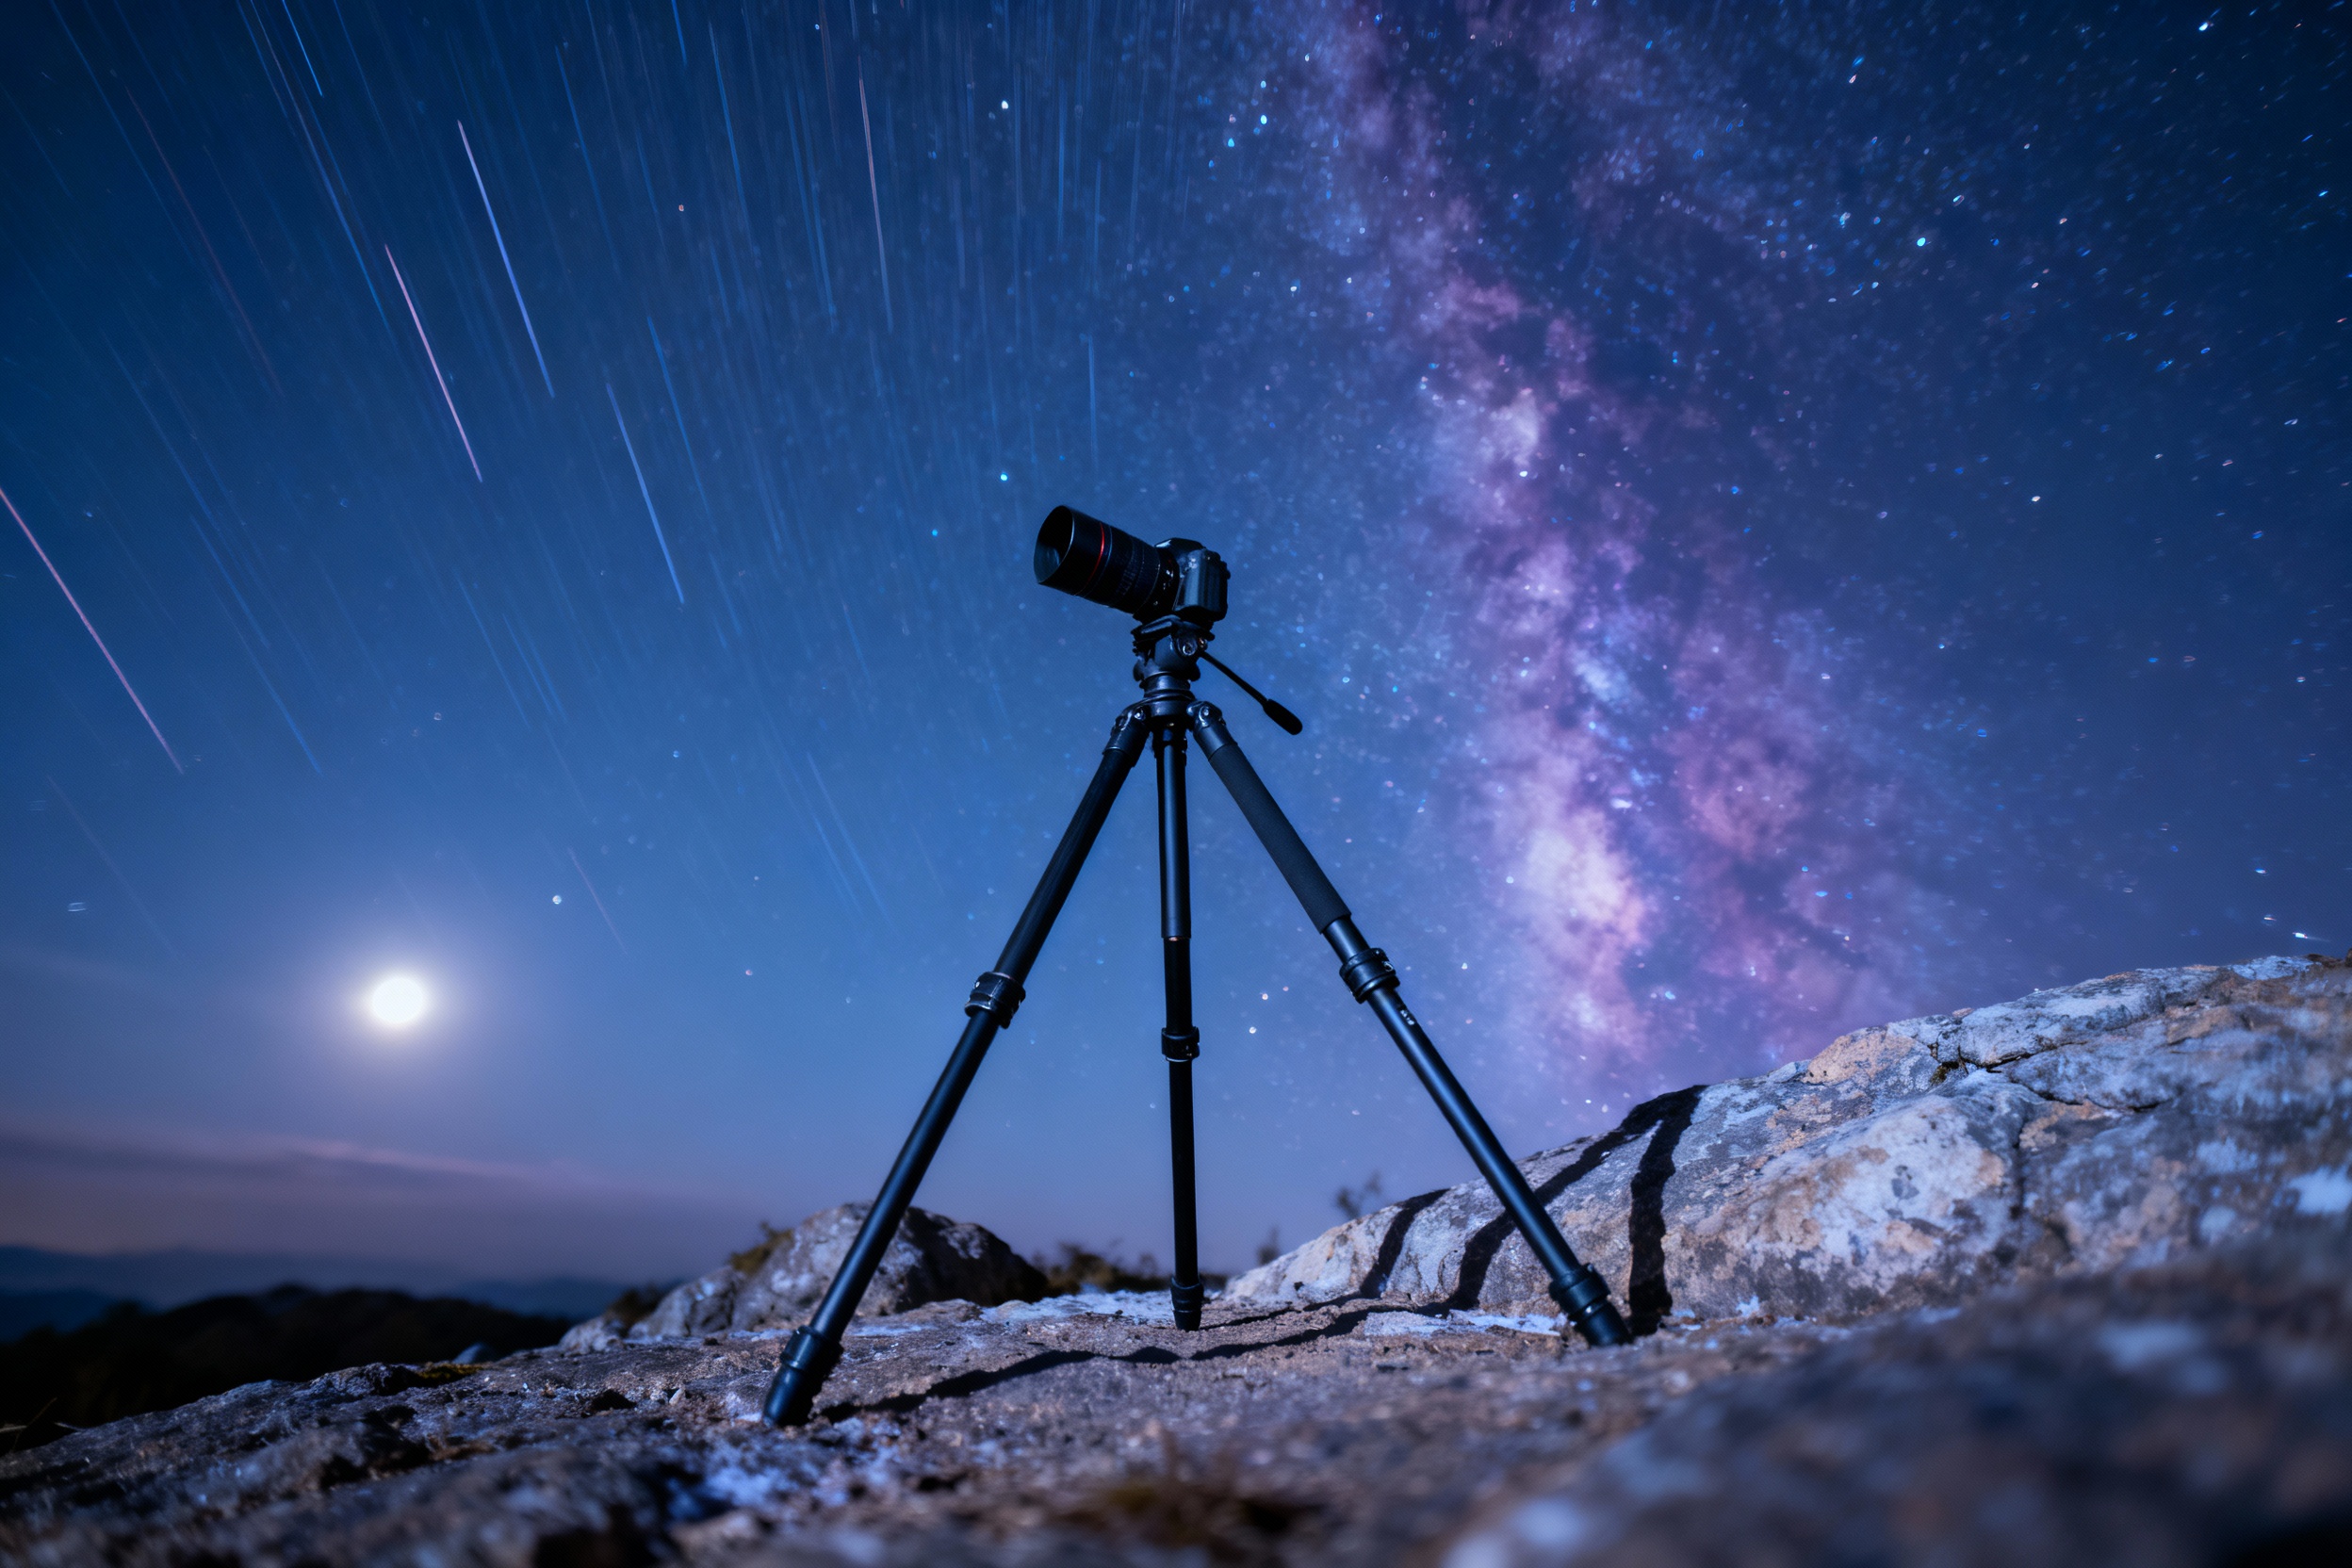
Night photography often involves exposures lasting several seconds or even minutes. Cheap, flimsy tripods may wobble in wind or sag under the camera’s weight, ruining shots. Look for models with robust leg locks, weather-resistant materials, and a low minimum height to avoid vibrations. Aluminum tripods, while slightly heavier, often provide better stability than carbon fiber at lower price points. Pairing your tripod with a weighted hook or sandbag can further anchor it, especially in breezy conditions.
Key Features to Look for in a Budget Tripod
Not all budget tripods are created equal. Prioritize features that enhance stability and usability in low-light environments. First, check the load capacity—your tripod should support at least twice your camera gear’s weight. Adjustable legs with rubber or spiked feet adapt to uneven terrain, crucial for shooting in fields or mountains. A reversible center column lets you position the camera close to the ground for unique compositions.
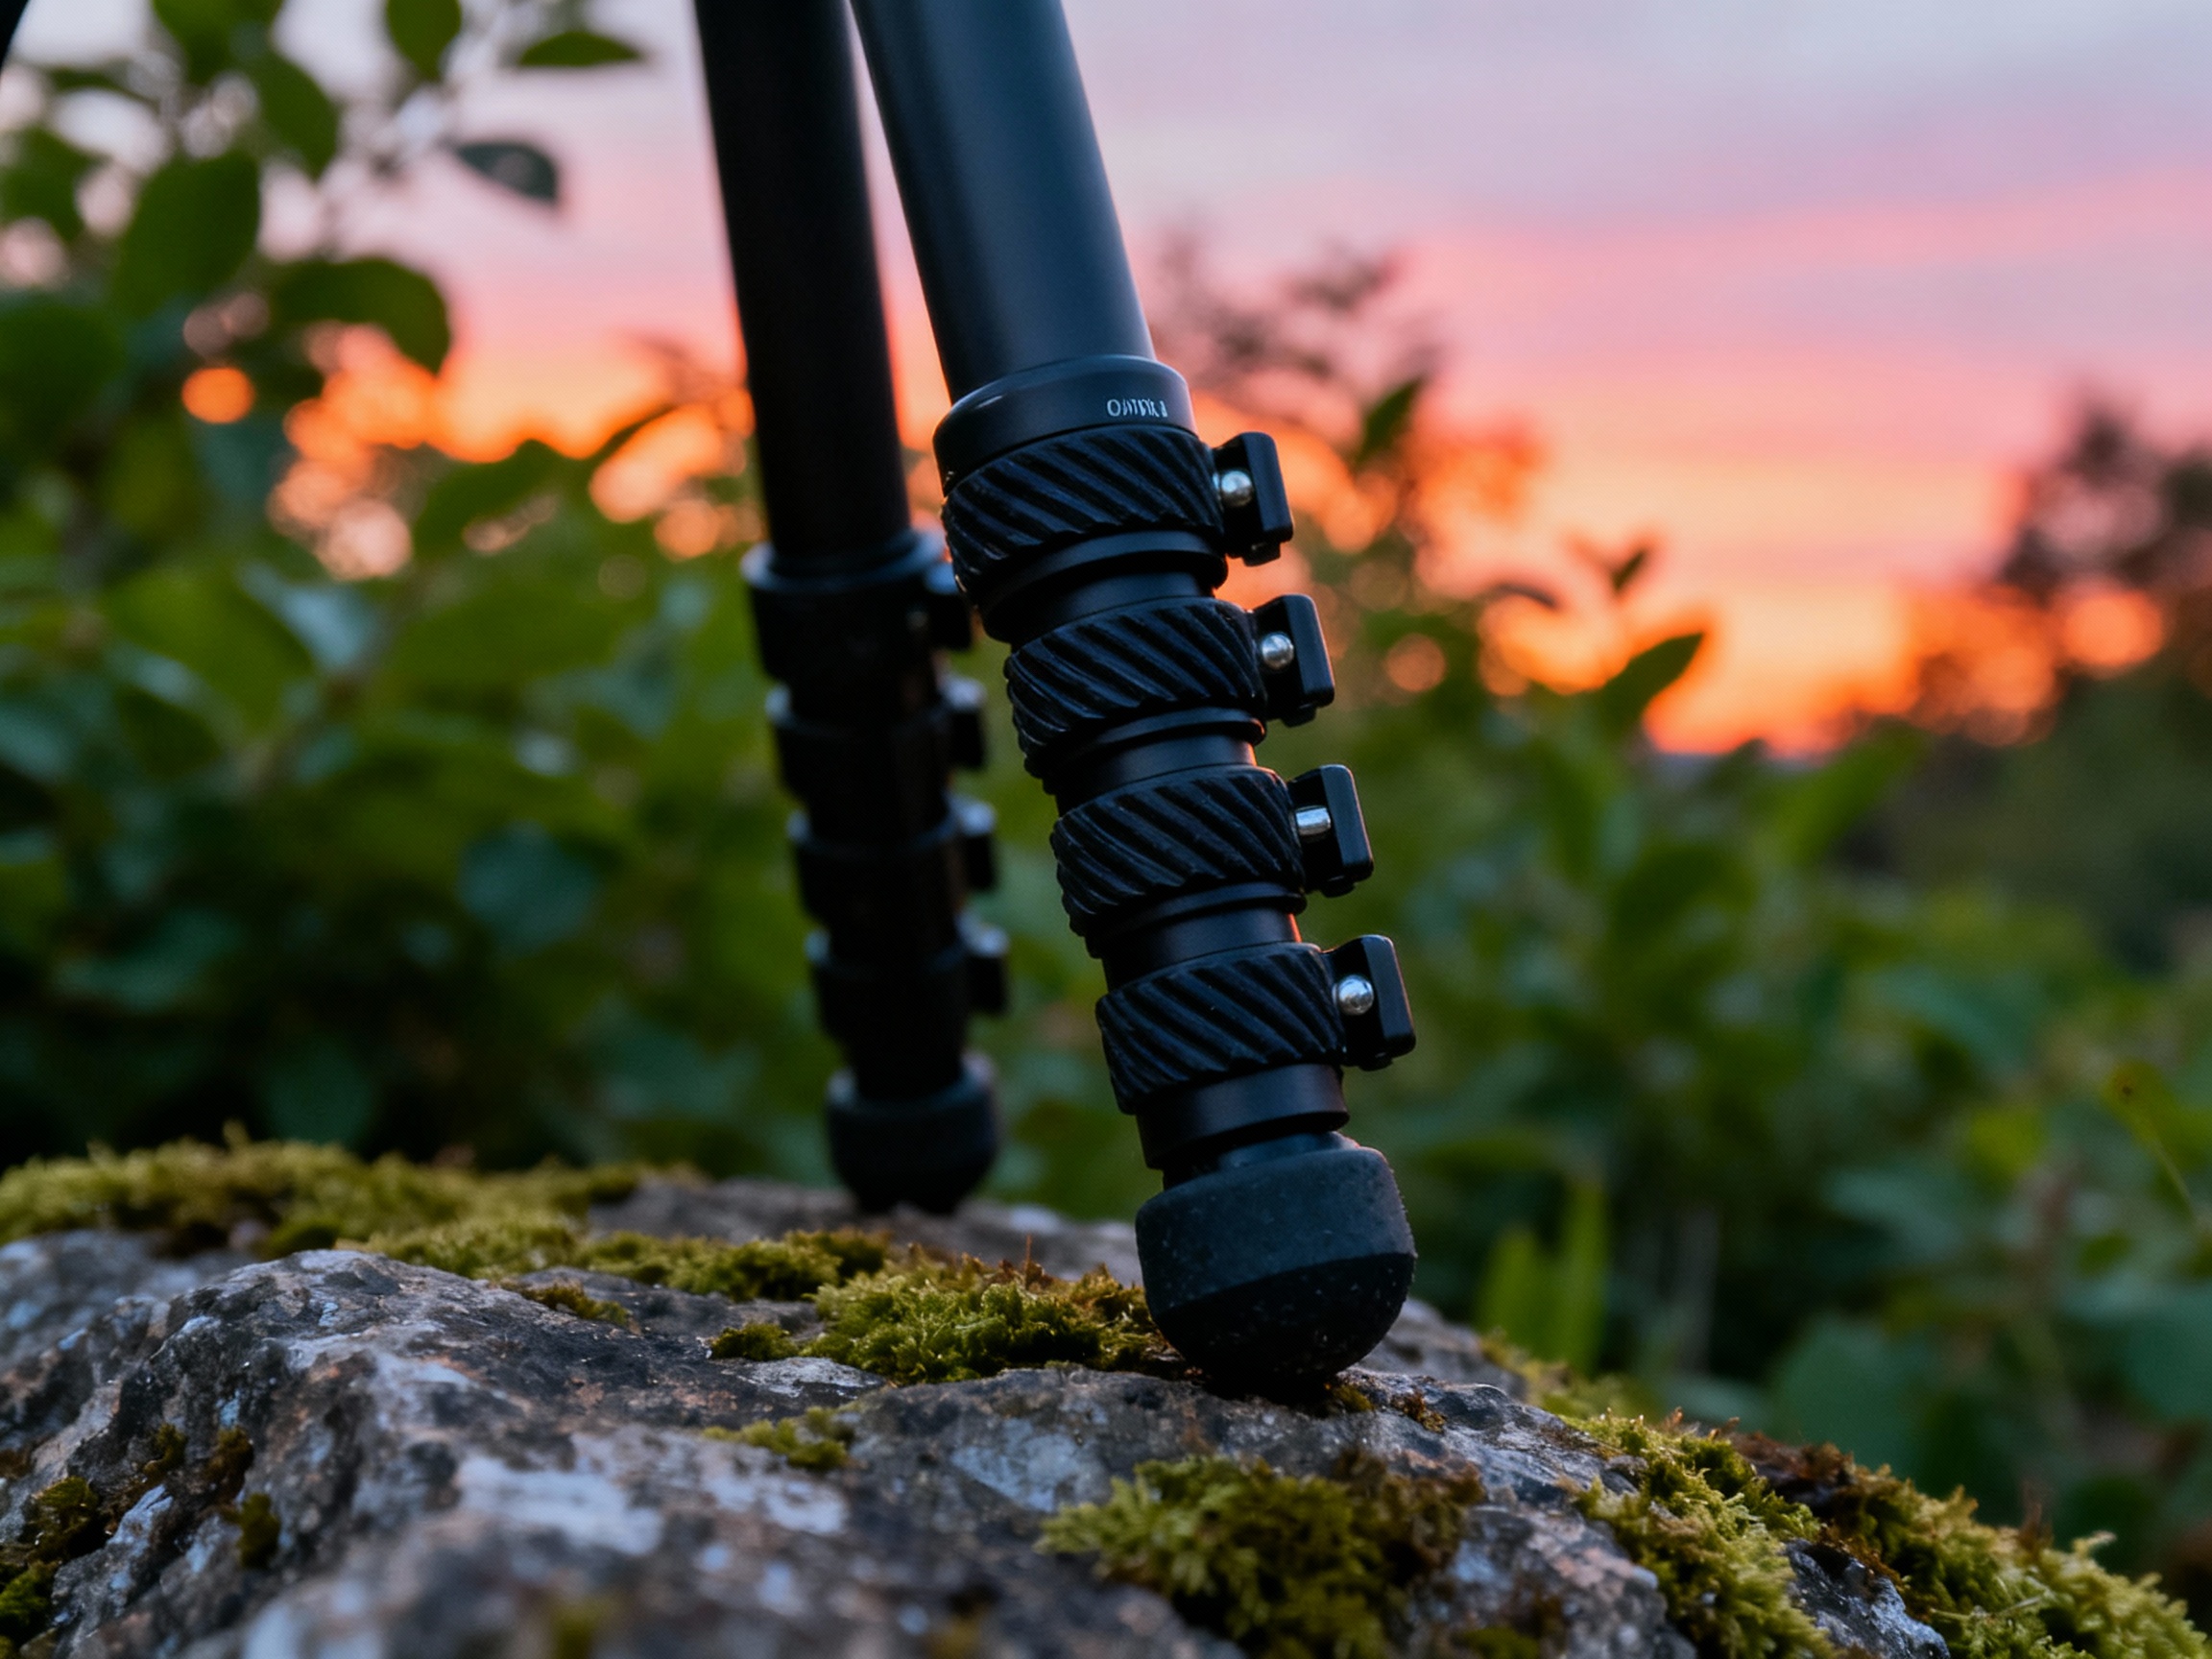
Height matters, but don’t fixate on maximum extension. Taller tripods can catch wind, and most night shots don’t require extreme elevation. Instead, focus on build quality: metal hinges, thick leg tubes, and a durable head. Ball heads are popular for their flexibility, but pan-tilt heads offer precise control for framing constellations. Lastly, consider portability. Compact, lightweight designs are ideal for hiking to dark-sky locations without sacrificing durability.
Top Budget Tripods for Astrophotography
1. Amazon Basics 60-Inch Tripod : A no-frills option with a 6.5-pound load capacity and adjustable legs. Its rubber feet and quick-release plate make it user-friendly for beginners. 2. Neewer Aluminum Tripod : Known for its robust build, this model includes a bubble level and carry bag. The 360-degree ball head supports smooth adjustments. 3. Zomei Z699C : A compact carbon fiber option with a center column hook for added stability. 4. Manfrotto Compact Advanced : Combining aluminum legs with a ergonomic design, this tripod excels in uneven terrain. 5. Vanguard Alta Pro 2+ : Though pricier, its multi-angle center column and superior load capacity justify the cost for serious hobbyists.
Each of these models has been tested in real-world night photography scenarios. The Zomei Z699C, for example, folds to 15 inches, making it easy to pack for remote shoots. The Manfrotto’s leg angles adapt to slopes, a lifesaver when shooting near hills or water. While carbon fiber options like the Zomei are lighter, aluminum tripods like the Neewer handle vibrations better, a trade-off worth considering.
Tips for Setting Up Your Tripod for Night Shots
Location scouting is half the battle. Arrive before dark to secure a stable spot—avoid loose soil or sand. Extend the legs fully first, then adjust the center column if needed. Use a remote shutter or timer to eliminate button-press vibrations. If your tripod has a hook, hang a bag of rocks or gear to lower its center of gravity. For windy nights, crouch the tripod to reduce its profile and tuck the legs inward.
Experiment with compositions during blue hour to save time. Once positioned, avoid touching the tripod until the exposure finishes. For extra stability, activate your camera’s mirror lock-up mode (if available) or use live view to minimize internal movements. If shooting star trails, ensure the tripod’s head is tightly secured to handle the camera’s weight over hours. A quick-release plate system can speed up adjustments between shots.
Maintaining and Upgrading Your Budget Tripod
Regular maintenance extends your tripod’s lifespan. Clean leg locks and joints after dusty or sandy outings using a soft brush. Lubricate metal parts with silicone spray to prevent corrosion. Check for loose screws or worn rubber feet, which are often replaceable. If the head becomes stiff, disassemble it (if possible) and wipe away debris.
Budget tripods can be upgraded incrementally. Replace the default head with a fluid video head for smoother panning during time-lapses. Add a smartphone mount or an L-bracket for vertical shots. For cold climates, foam leg wraps improve grip and insulation. Remember, even a modest tripod can outperform expensive models when paired with thoughtful techniques and care.