Planning Shoots Around Moon Phases
```html
Understanding Moon Phases and Their Impact on Photography
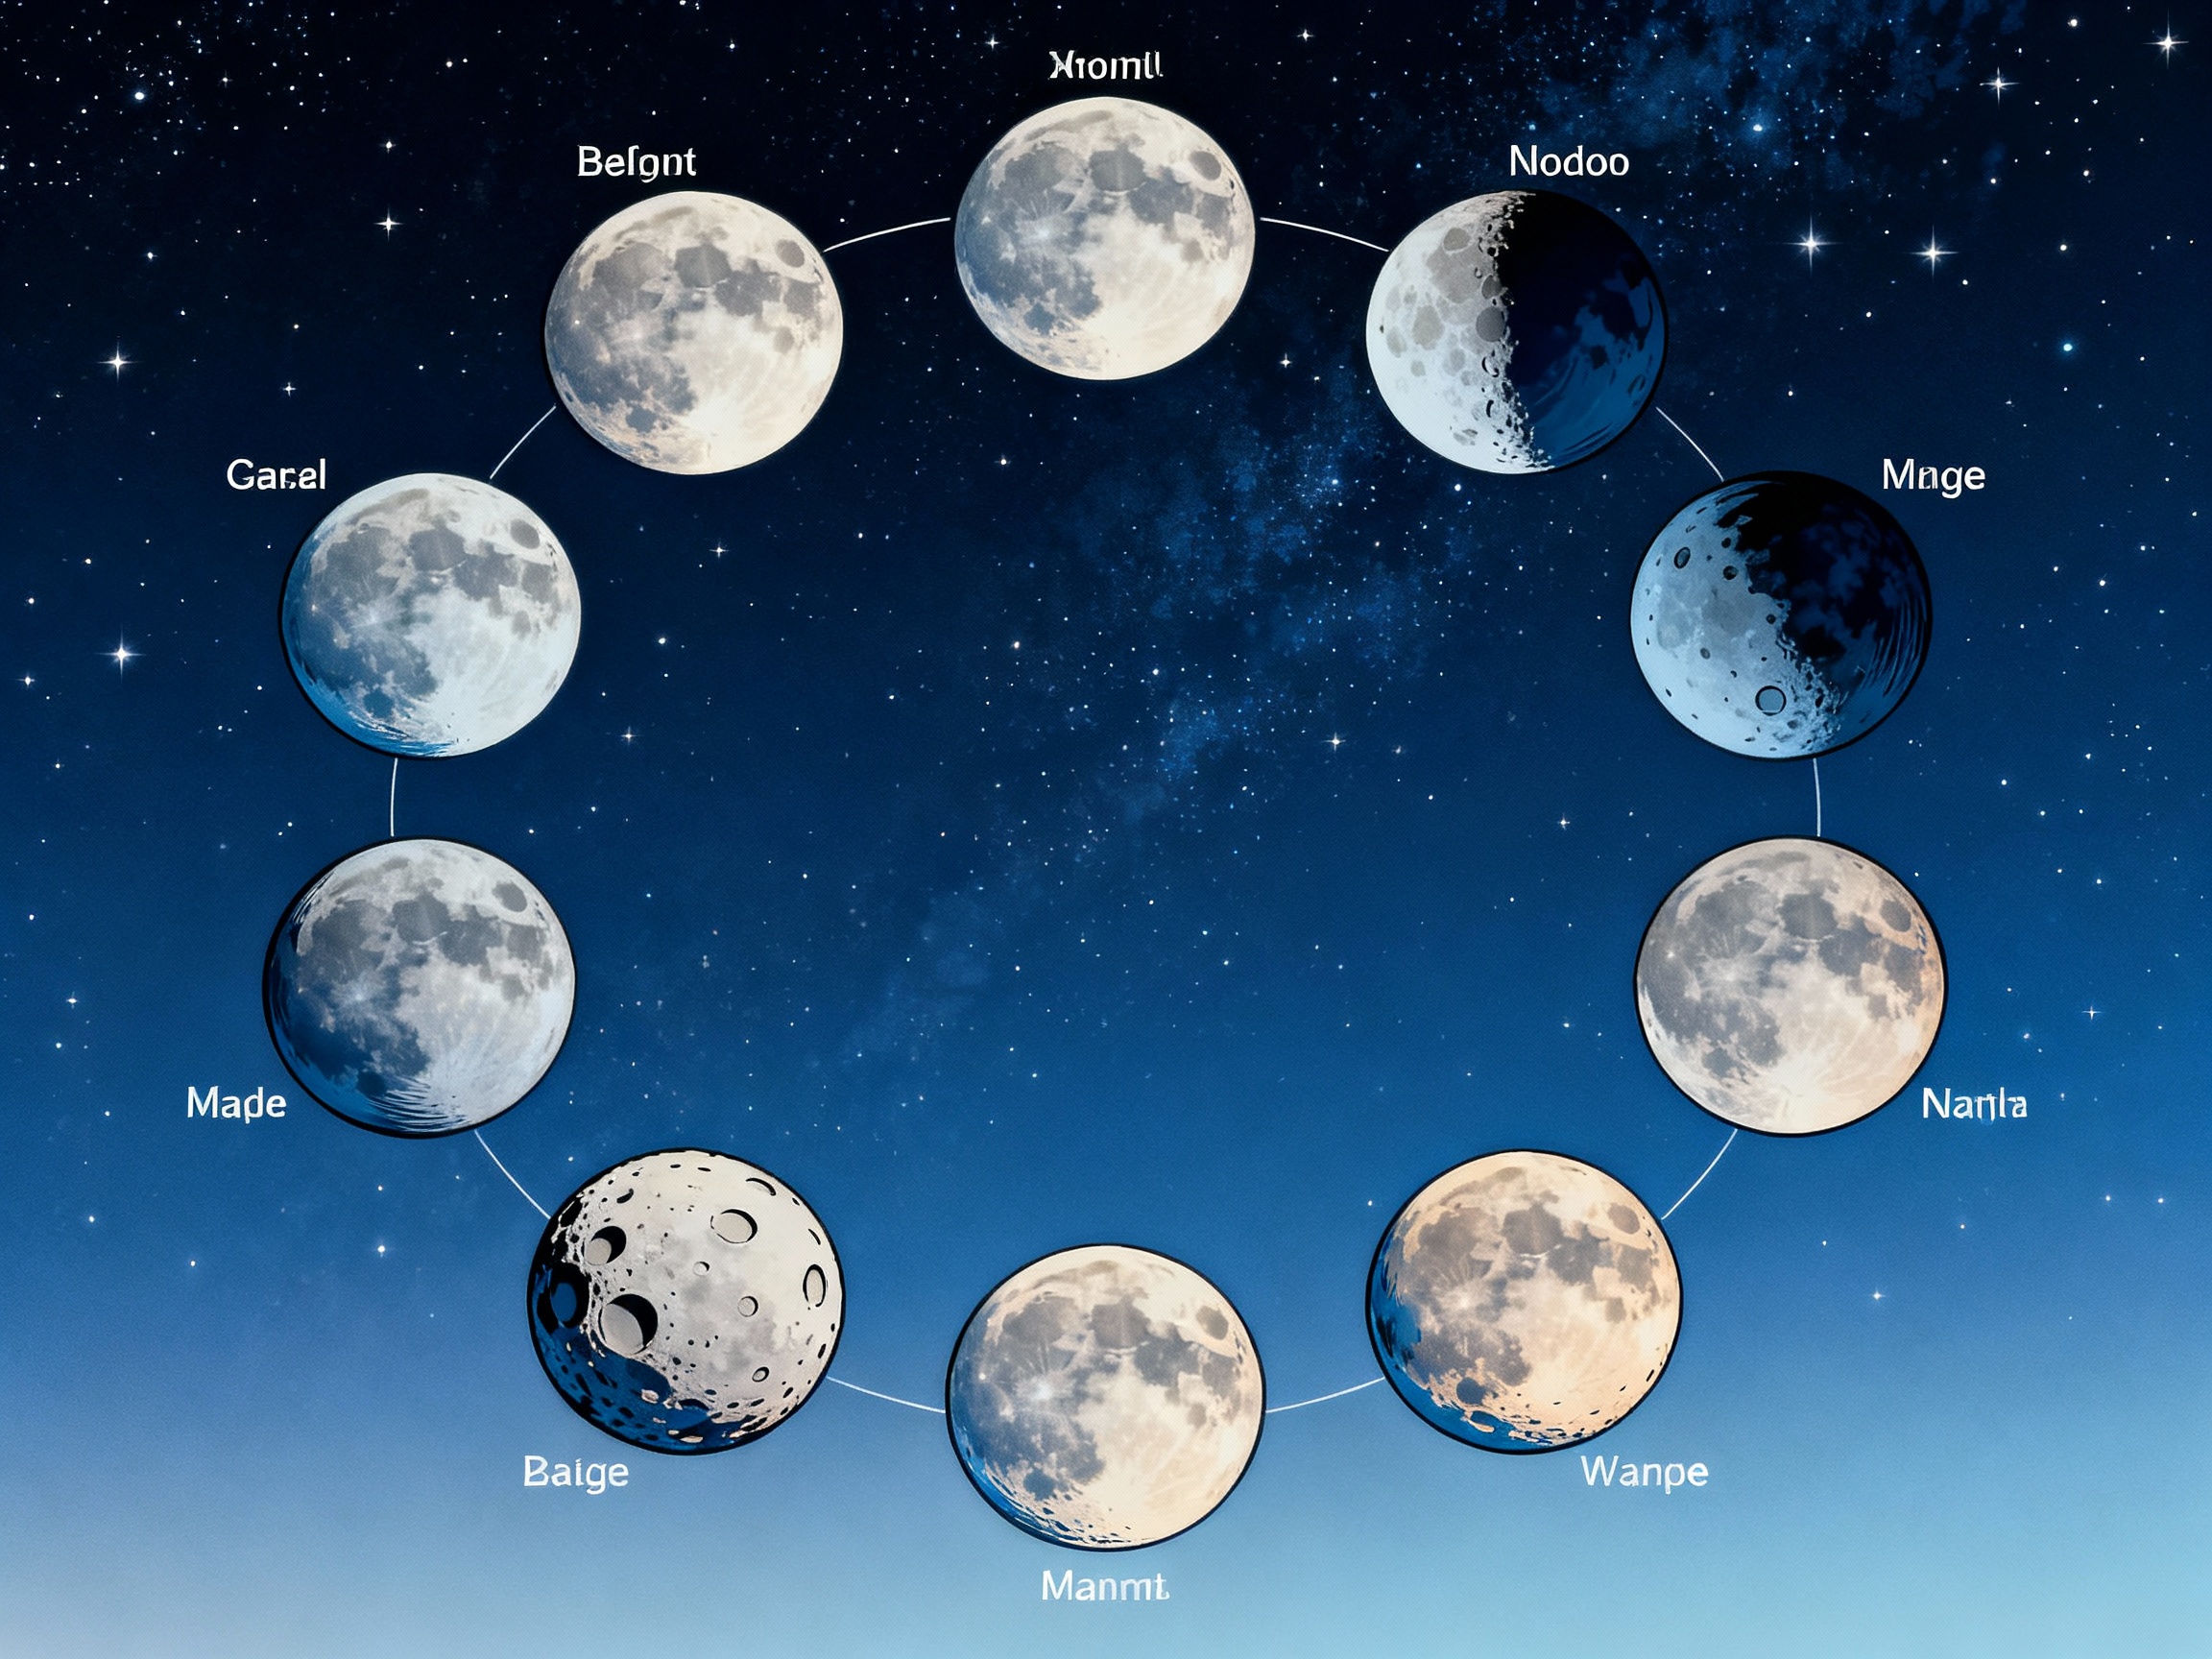
The moon’s cyclical journey from new to full and back again offers photographers a dynamic palette of light and shadow. Each phase—new moon, waxing crescent, first quarter, waxing gibbous, full moon, waning gibbous, last quarter, and waning crescent—creates distinct lighting conditions. A full moon bathes landscapes in silvery light, ideal for dramatic compositions, while a new moon plunges the world into darkness, revealing stars and galaxies. Timing shoots around these phases requires understanding lunar cycles (approximately 29.5 days) and how they interact with time of day, weather, and location. Tools like lunar calendars and apps help predict moonrise and moonset times, ensuring you’re prepared to harness its magic.
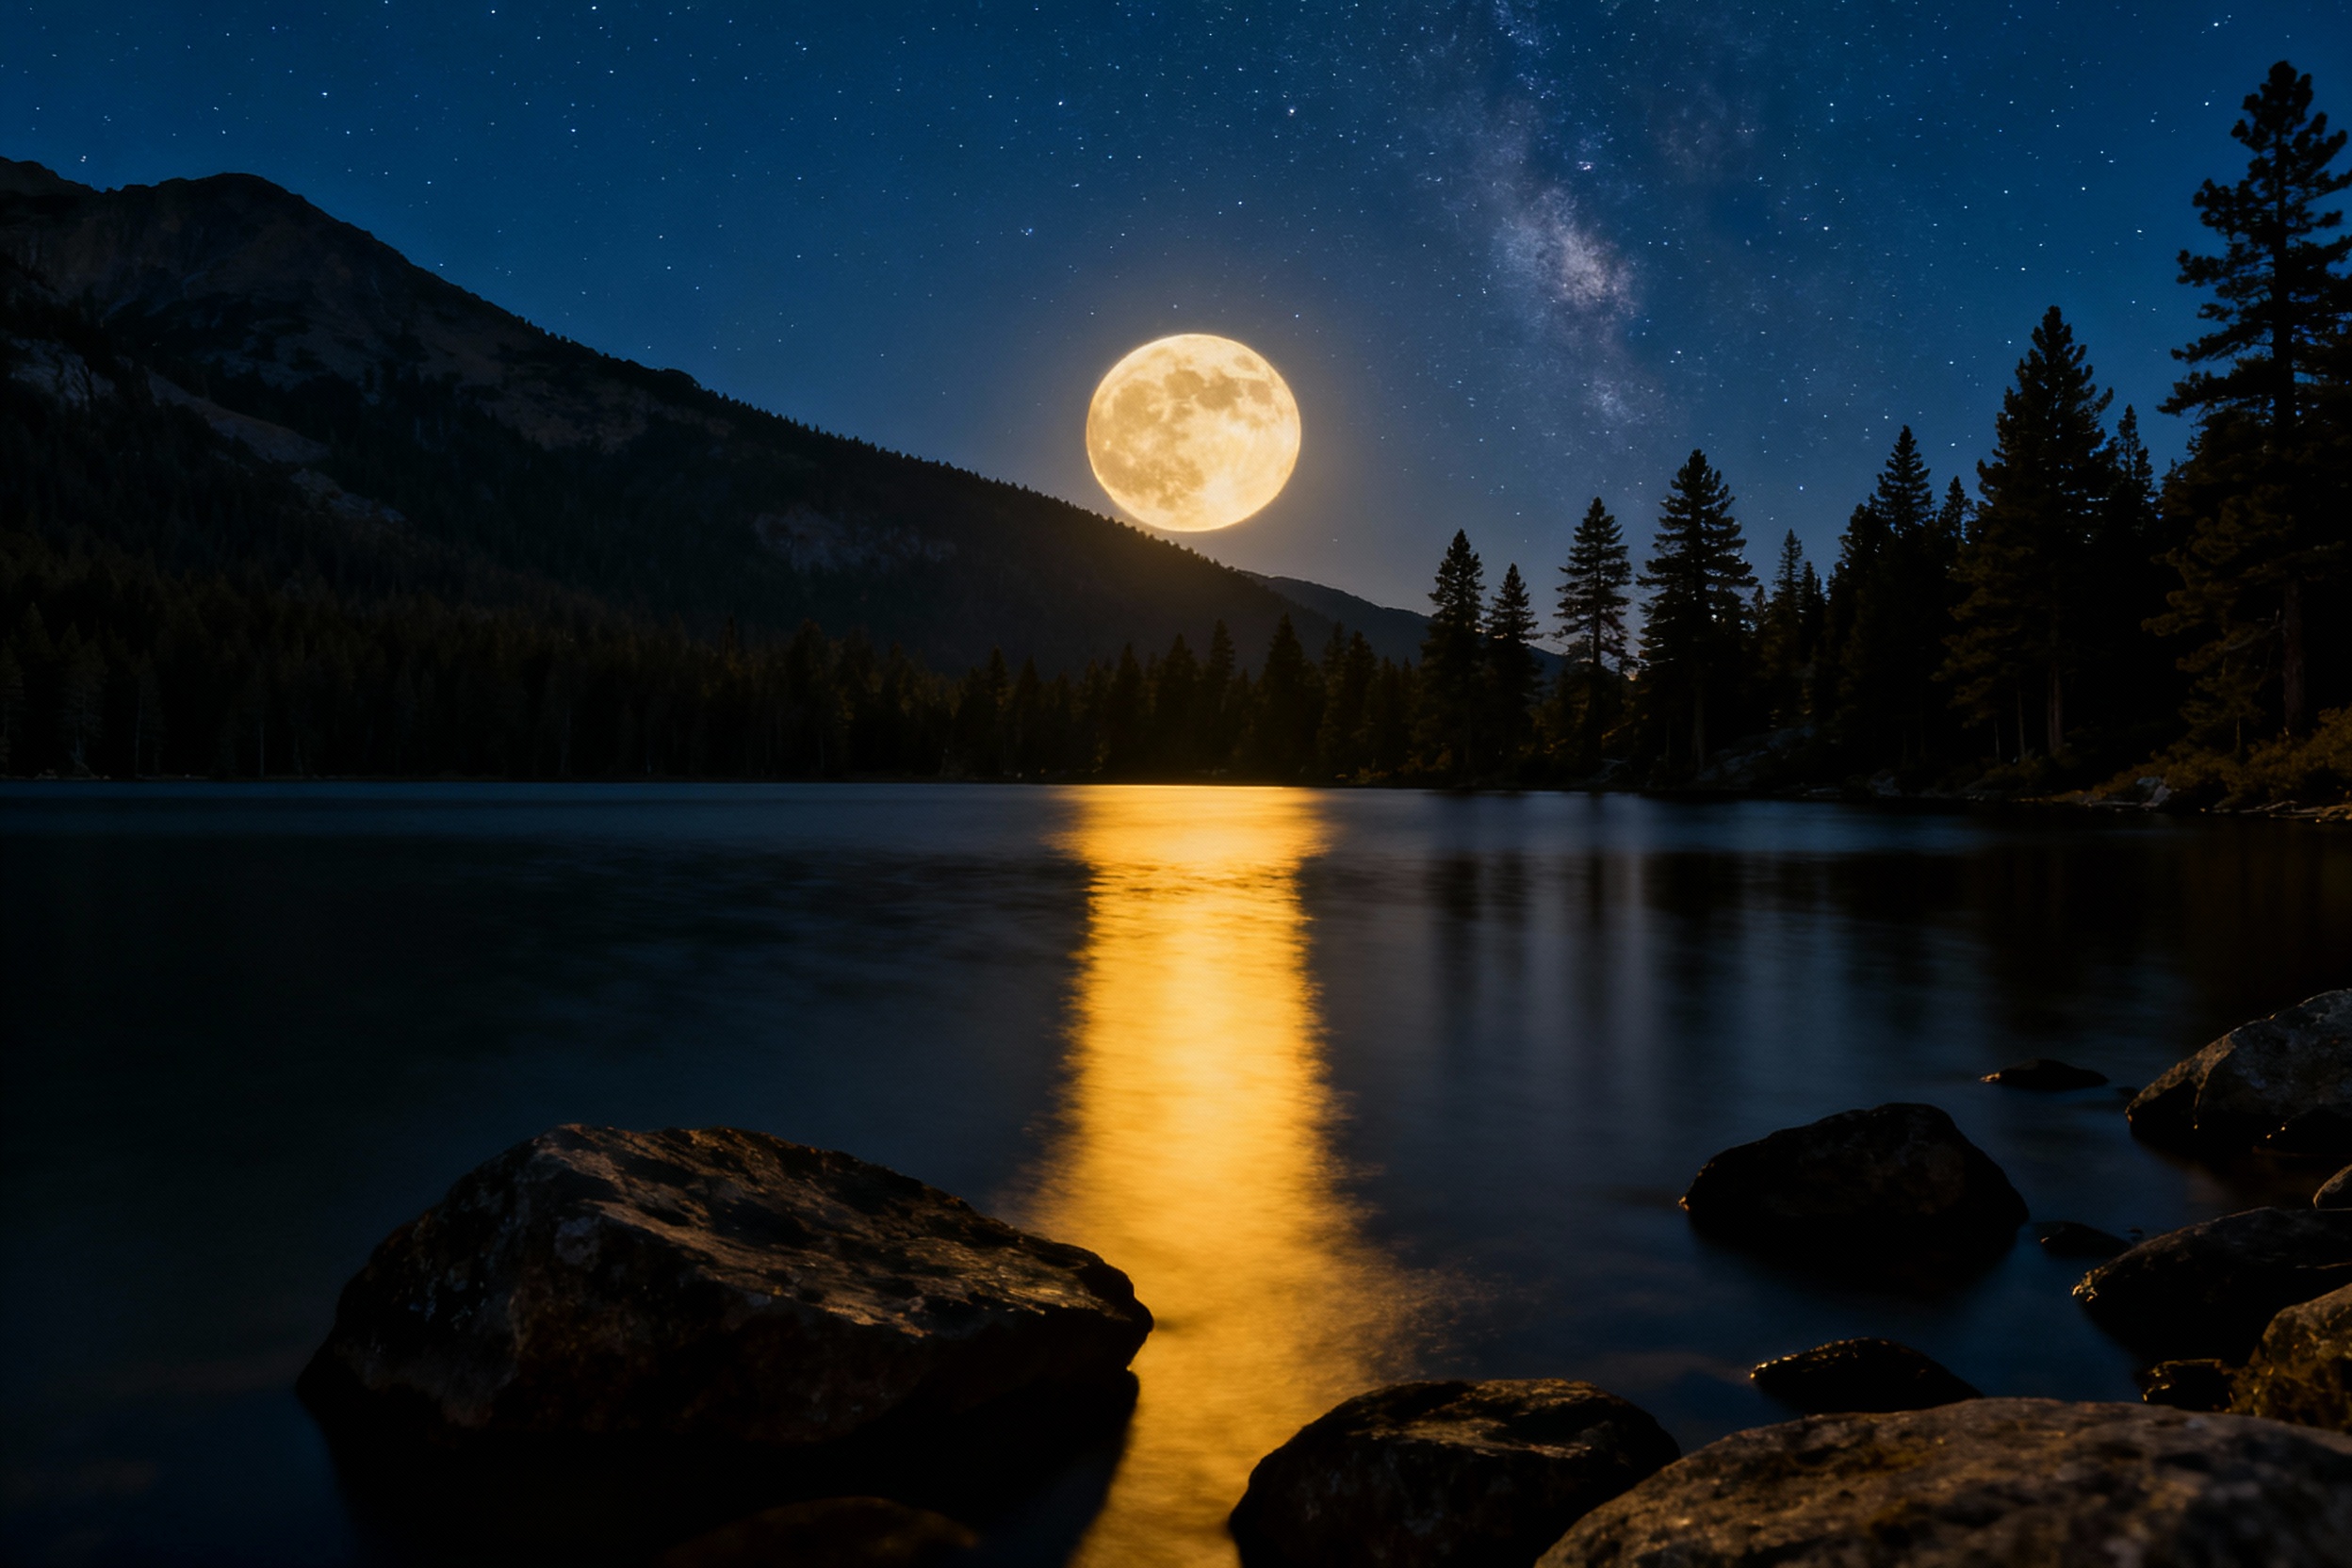
The Full Moon: Maximizing Light and Drama
Photographing under a full moon transforms night into day, casting sharp shadows and illuminating textures. Landscape photographers often use this phase to capture mountains, forests, or oceans bathed in ethereal light. For portraits, the moon acts as a natural softbox, creating subtle highlights. Position the moon behind your subject for a celestial backdrop, or use it as a front light to reveal details. Challenges include overexposure; bracketing exposures or using a low ISO (200–800) ensures detail retention. Pair the moon with moving elements—waves, clouds, or wildlife—to add dynamism. Remote locations minimize light pollution, enhancing the moon’s glow.
New Moon Magic: Capturing the Night Sky’s Hidden Details
When the moon vanishes, the night sky unveils its depth. The new moon phase is prime for astrophotography: galaxies, nebulae, and the Milky Way shine unobstructed. Use wide-angle lenses (14–24mm) to frame vast skies and foreground elements like mountains or ruins. Long exposures (20–30 seconds) at high ISO (1600–6400) capture faint starlight. Light painting—illuminating rocks or trees with a flashlight—adds contrast. Timing is critical; shoot during astronomical twilight, when the sun is 18° below the horizon. Check weather apps for clear skies and moonless nights, and scout locations during daylight to avoid hazards.
Crescent Moons and Golden Hours: Balancing Earthly and Celestial Light
A crescent moon—whether waxing or waning—pairs beautifully with twilight’s soft hues. During blue hour, the slim moon complements pastel skies, while its faint glow highlights clouds or water. Position the moon near the horizon for warm color contrasts: a golden crescent against dusk’s oranges or dawn’s pinks. Use this phase for minimalist compositions, such as a lone tree beneath the moon or a boat on a still lake. Exposure blending merges foreground and sky details. For urban shoots, juxtapose the moon with city lights or architecture for a surreal effect.
Lunar Eclipses: Preparing for Rare Celestial Events
Lunar eclipses—when Earth’s shadow blankets the moon—offer a fleeting chance to capture the “blood moon.” Research eclipse timelines to pinpoint totality duration and location visibility. Use a telephoto lens (200–400mm) to frame the moon’s coppery hues. Start with shorter exposures as the eclipse begins, then increase shutter speed as darkness falls. Include landmarks for scale or narrative. Shoot in RAW to retain color flexibility during editing. Test compositions beforehand, as the eclipse’s progression leaves little time for adjustments.
Gear and Settings for Moonlit Photography
Essential gear includes a sturdy tripod, remote shutter, and fast lenses (f/2.8 or wider). For moon details, telephoto lenses (70–200mm+) are ideal. Neutral density filters balance exposures during bright phases. Manual focus ensures crispness; use live view zoom to refine. Settings vary: for full moons, try f/8, ISO 400, 1/125s; for starry skies, f/2.8, ISO 3200, 25s. Shoot in manual mode and bracket exposures. Carry headlamps with red light to preserve night vision and minimize distractions.
Planning Tools: Apps and Resources for Tracking Moon Phases
Apps like PhotoPills, The Photographer’s Ephemeris, and SkySafari provide moonrise/moonset times, azimuth, and phase percentages. Google Earth scouts locations virtually, while ClearDarkSky predicts cloud cover. Plan shoots around moon transitions: arrive early to compose shots before optimal light. Social media groups and forums share real-time updates on celestial events and local conditions.
Case Studies: Successful Shoots Inspired by Lunar Cycles
Example 1: A portrait session during a full moon in Joshua Tree used the moon’s glow to illuminate a dancer against boulders. Example 2: A Milky Way arch over a desert tower required a new moon and precise timing. Example 3: A time-lapse of a waxing crescent moon rising behind Chicago’s skyline merged urban and celestial elements. Each project hinged on planning, adaptability, and leveraging lunar characteristics.
Creative Concepts: Using Moon Phases to Tell Visual Stories
Incorporate the moon as a narrative symbol: a crescent as a metaphor for growth, a full moon as a beacon of clarity. Experiment with double exposures to blend lunar phases with human subjects. For surrealism, shoot the moon through textured glass or prisms. Time-lapses of moonrises condensed into seconds reveal celestial motion. Pair lunar cycles with seasonal changes—harvest moons with autumn foliage or winter moons over snowscapes.