Simple HDR Blending for Lunar Shots
```html
Why the Moon Demands HDR Blending
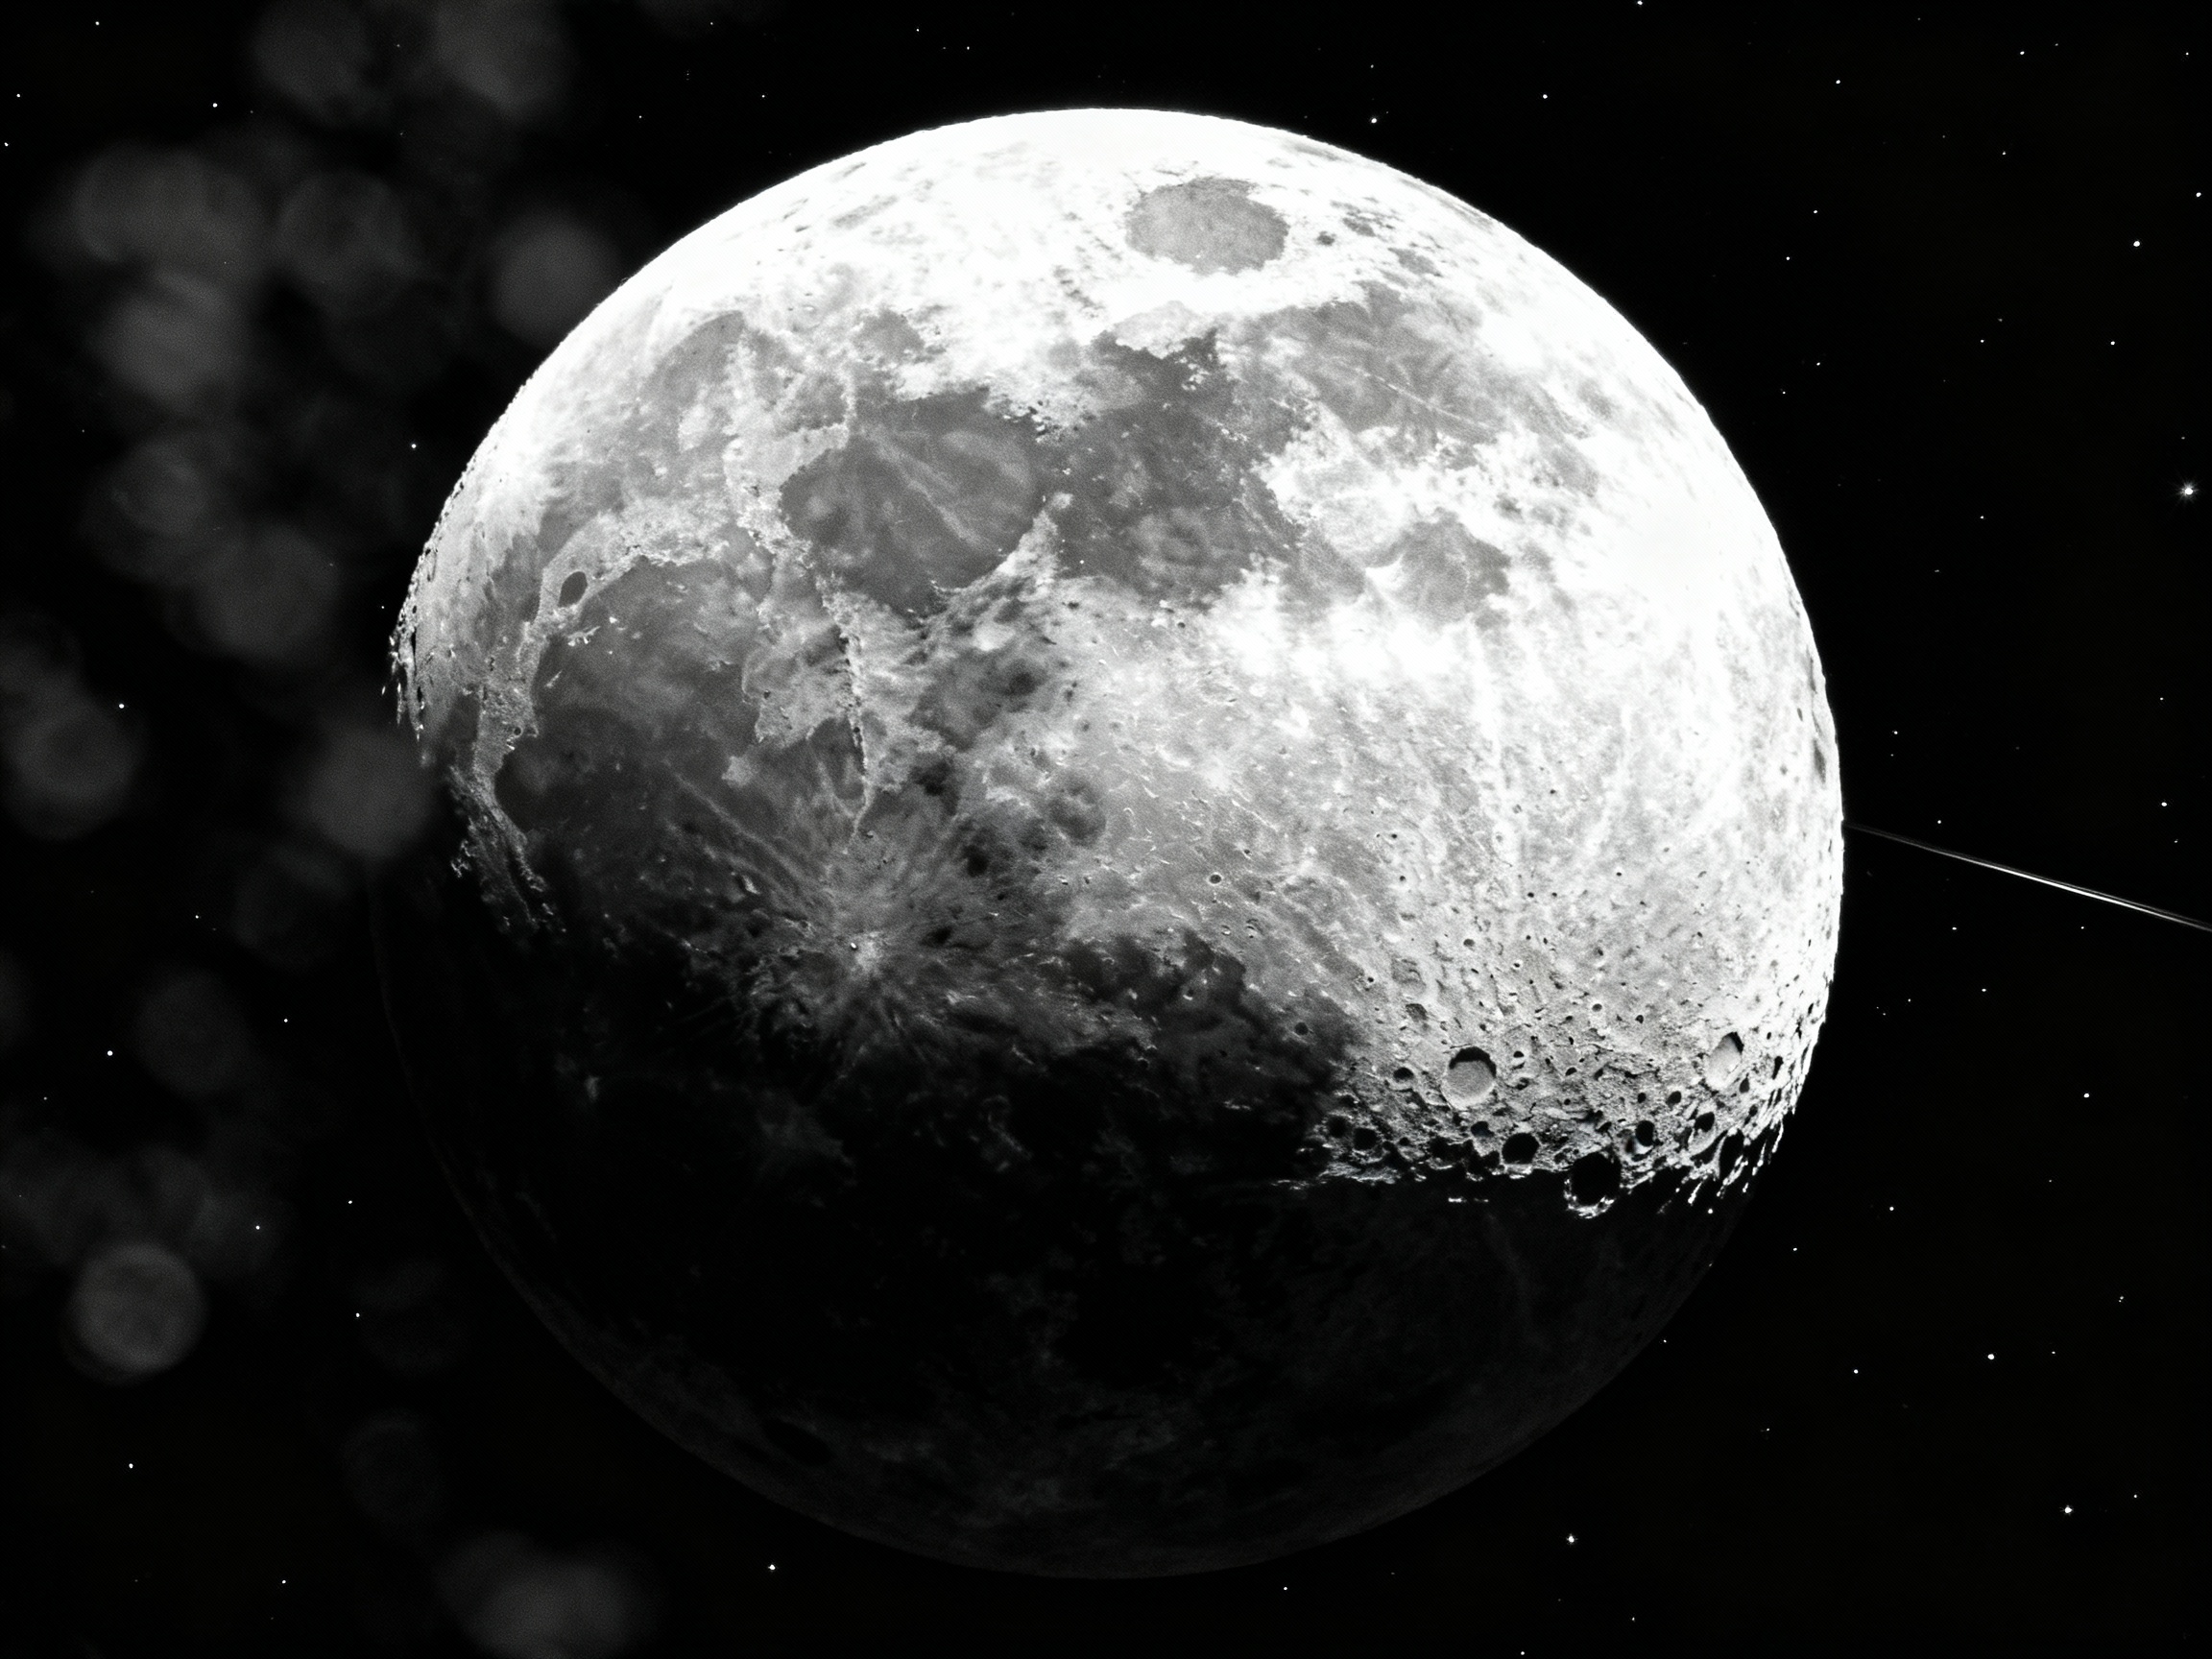
The moon’s stark contrast between bright highlights and shadowy craters makes it a challenging subject for photographers. Single exposures often lose detail in either the moon’s sunlit surface or the surrounding night sky. High Dynamic Range (HDR) blending solves this by combining multiple exposures into a single image. This technique preserves texture in the moon’s surface while maintaining depth and context in the darker areas. Whether you’re capturing a crescent or a full moon, HDR ensures your shot mirrors the awe of seeing Earth’s celestial companion with the naked eye.
Preparing Your Lunar Shoot: Gear and Settings
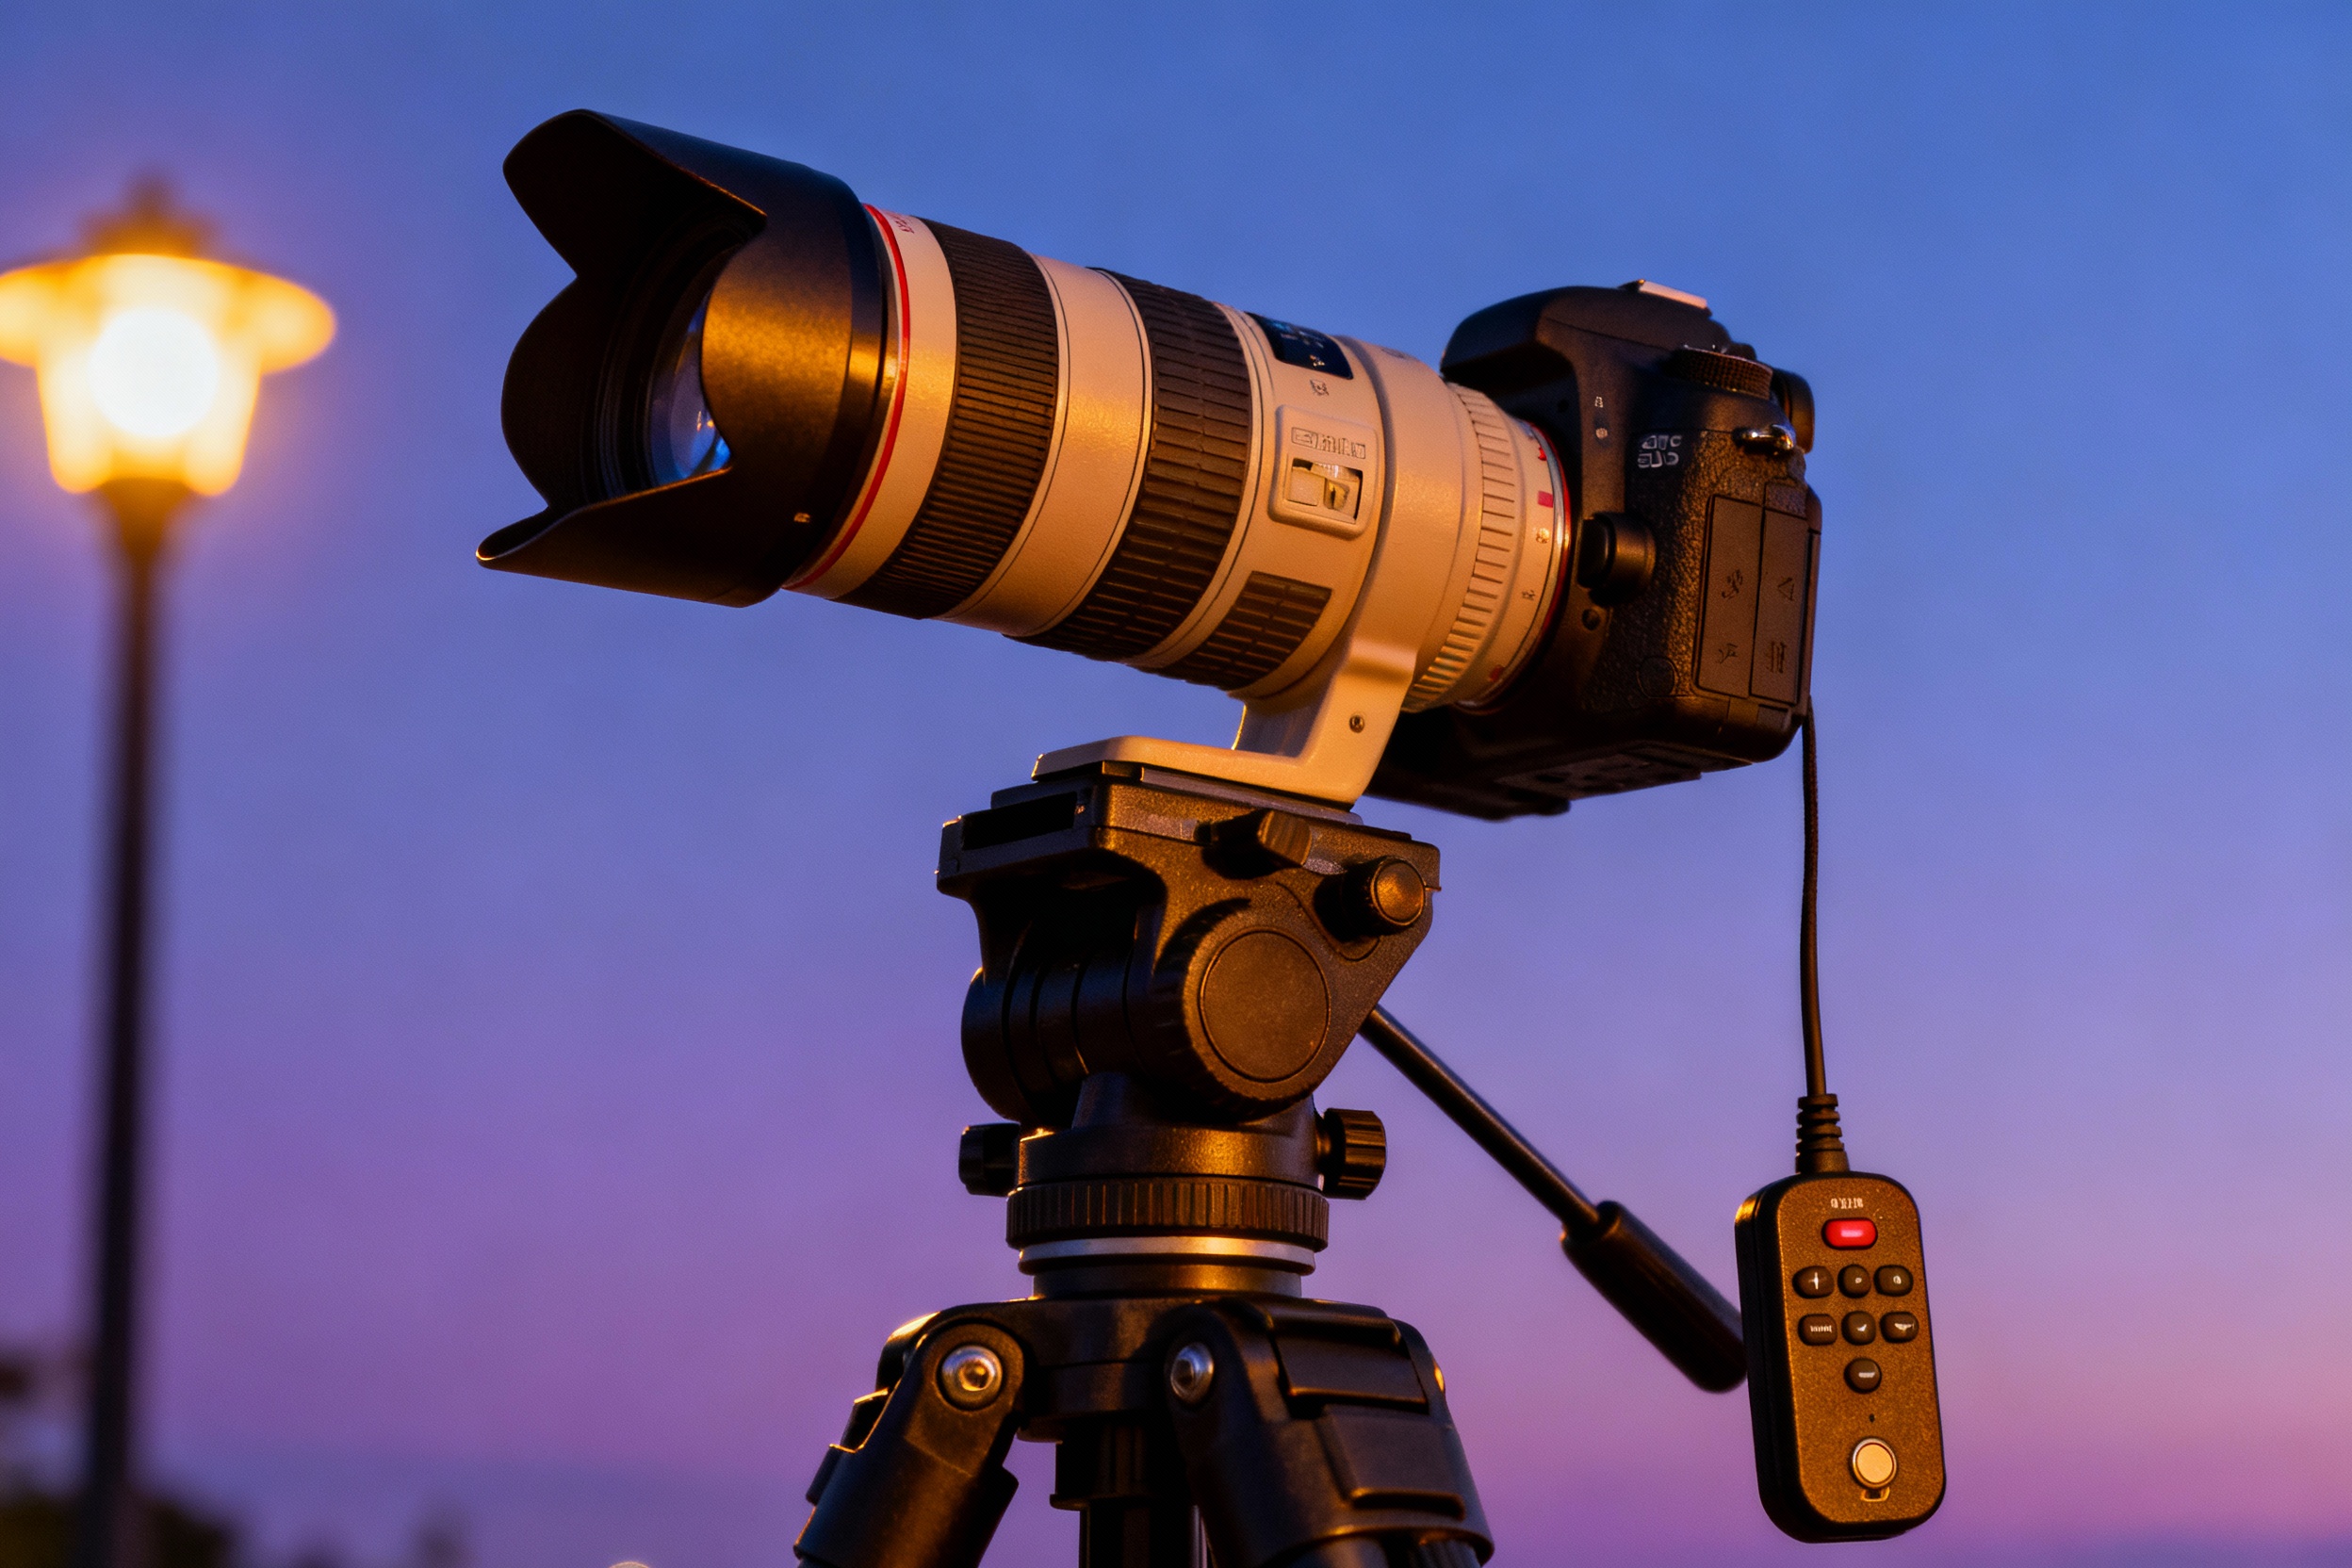
Start with a sturdy tripod to eliminate vibrations, crucial for aligning multiple exposures. A telephoto lens (200mm or longer) or telescope is ideal for filling the frame with the moon. Use manual focus to ensure sharpness, and disable image stabilization to avoid introducing motion blur. Set your camera to aperture priority (f/8–f/11) for optimal sharpness and shoot in RAW to retain maximum data. Enable exposure bracketing (±1-2 stops) to capture a minimum of three exposures. A remote shutter release or timer prevents shakes during capture.
Bracketing Exposures: A Step-by-Step Guide
Begin by metering for the moon’s highlights. Take a test shot to check histogram distribution—aim to avoid clipping on either end. Activate bracketing mode and capture three shots: one at baseline exposure, one underexposed (-1 stop) to retain highlight detail, and one overexposed (+1 stop) to recover shadows. For complex lighting, expand to five brackets. Keep the ISO low (100–400) to minimize noise, and adjust shutter speed between shots. Verify that the moon’s position remains consistent across frames to simplify alignment in post-processing.
Blending Techniques in Post-Processing
Import your bracketed shots into HDR software like Aurora HDR or Lightroom’s Merge to HDR tool. Avoid heavy tonemapping, which can introduce halos. For manual control, layer exposures in Photoshop using masks to paint in details from specific frames. Focus on blending the overexposed shot’s shadow regions with the underexposed shot’s highlight recovery. Use luminosity masks to target adjustments precisely. Soft brushes (30% opacity) help maintain natural transitions between blended areas.
Avoiding Common HDR Blending Pitfalls
Overprocessed HDR images often suffer from unrealistic halos around the moon or unnaturally flat shadows. To prevent this, limit adjustments to localized areas instead of global sliders. Check for alignment issues caused by the moon’s orbital motion; use Auto-Align Layers in Photoshop or PTGui for panoramas. Noise reduction should be applied selectively to darker regions, preserving crispness in the lunar surface. Finally, resist the urge to oversharpen—subtle clarity adjustments often yield more natural results.
Case Study: Reviving a Washed-Out Crescent Moon
A photographer’s raw crescent moon shots featured blown-out highlights and a barely visible Earthshine (the dark side faintly lit by reflected sunlight). By blending a +2 exposure to recover Earthshine detail and a -2 exposure to tame highlights, they combined the best of both frames using luminosity masking. Final touches included a curves adjustment to deepen the sky and a mild dehaze filter to enhance atmospheric clarity. The result showcased delicate Earthshine texture without sacrificing the crescent’s glow.
Experimenting Beyond Basics: Creative HDR Ideas
Once comfortable with technical blending, push boundaries by incorporating foreground elements like silhouetted trees or cityscapes. Blend a twilight sky (captured during blue hour) with a later moon exposure for composite landscapes. For artistic effects, layer in star trails or auroras from separate shots. Always disclose composites to maintain transparency, but embrace the creative potential of HDR as a storytelling tool.