White Balance Settings for Natural Skies
```html
Understanding White Balance: The Foundation of Accurate Colors
White balance (WB) is a critical yet often overlooked tool in photography that ensures colors in your images appear natural and true to life. At its core, white balance adjusts the color temperature of a photo to counteract the dominant light source’s hue. Natural skies, ranging from the golden warmth of sunrise to the cool blues of twilight, demand precise WB adjustments to avoid unnatural color casts. Whether you’re shooting raw or JPEG, mastering WB settings allows you to preserve the mood and authenticity of a scene without relying solely on post-processing.
How White Balance Impacts Sky Colors in Photography
The sky’s color is a dynamic element that shifts with time, weather, and location. Incorrect white balance can turn a serene blue sky into a dull gray or an overly orange sunset into an unnatural magenta mess. For instance, using the “Daylight” preset during the golden hour might exaggerate warm tones, while the “Shade” preset on an overcast day could introduce excessive coolness. By aligning WB settings with the ambient light’s color temperature (measured in Kelvin), photographers can capture skies that mirror reality—whether it’s the crisp azure of midday or the delicate pastels of dawn.
Common White Balance Mistakes and How to Avoid Them
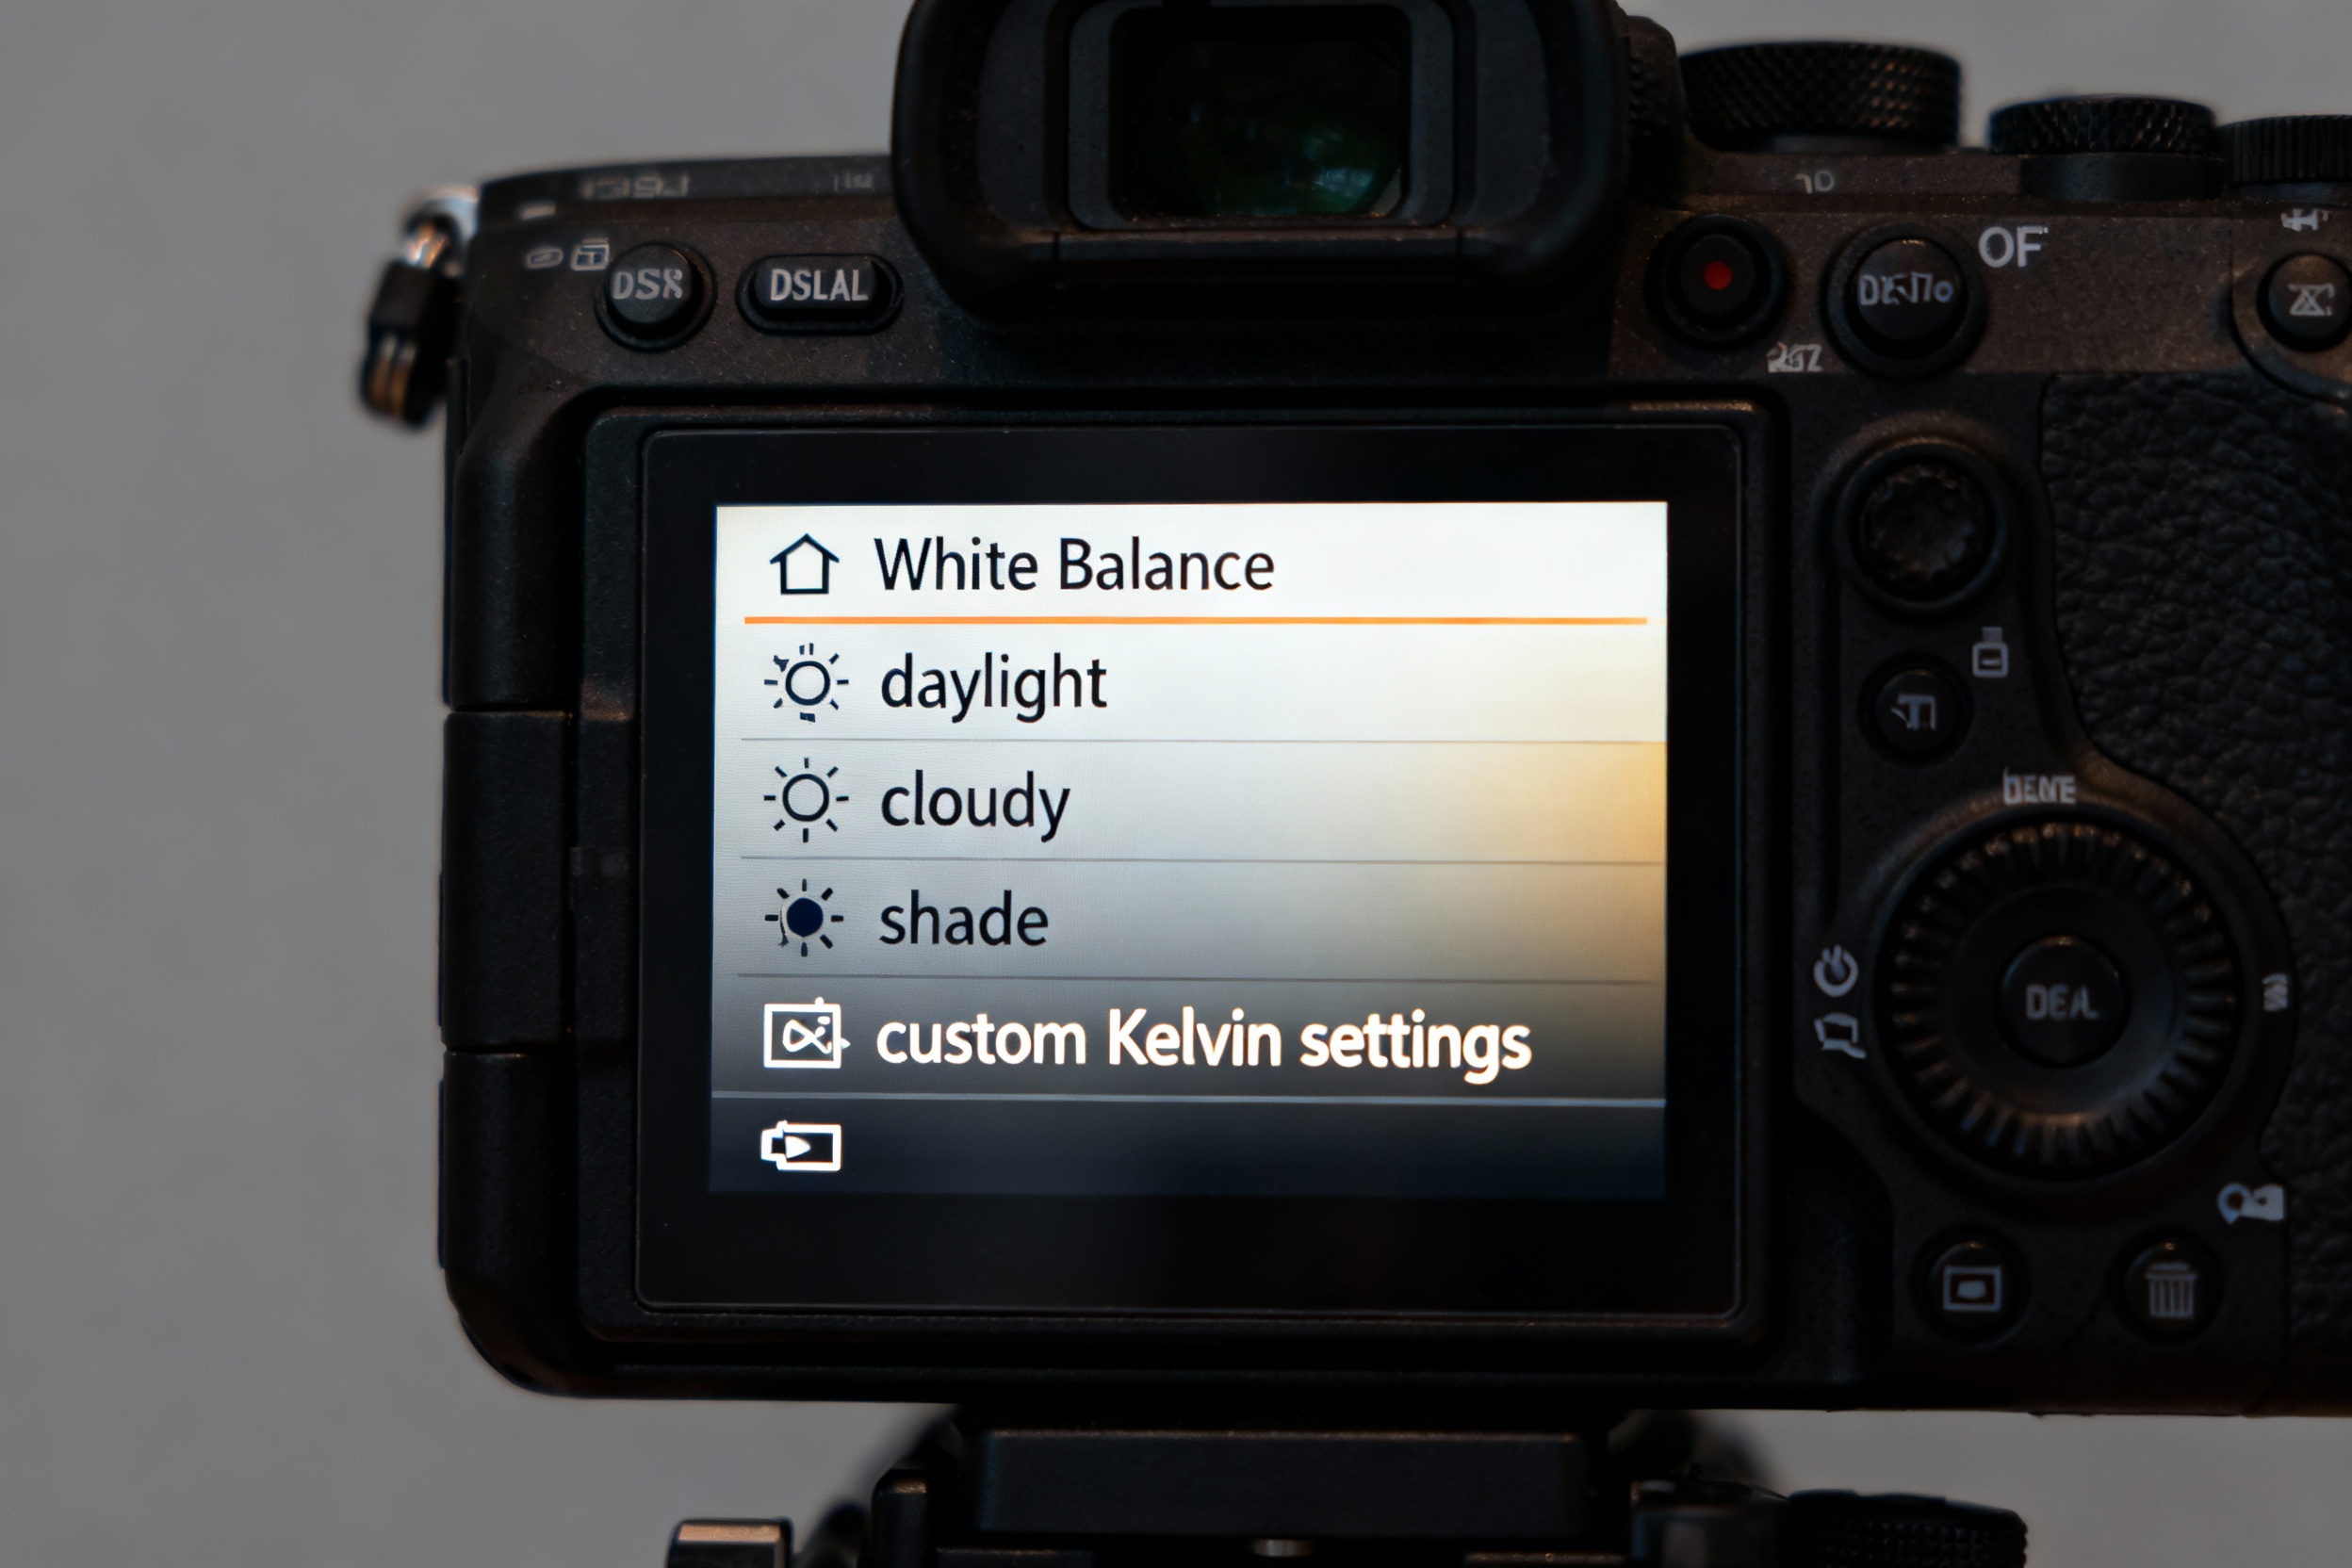
One frequent error is relying exclusively on auto white balance (AWB), which can misinterpret mixed lighting or subtle sky tones. AWB might neutralize the warmth of a sunset, stripping it of its vibrancy. Another pitfall is using presets like “Tungsten” or “Fluorescent” in outdoor settings, which can cast unrealistic blue or green hues over landscapes. To avoid these issues, shoot in raw format to retain flexibility, and use custom Kelvin adjustments based on the ambient light. Test shots with live view or histograms also help identify color imbalances before committing to a setting.
Optimal White Balance Settings for Different Times of Day
The sun’s position dramatically affects the color temperature of daylight. At noon, values around 5500K replicate neutral tones, while sunrise and sunset often require 3000–4000K to retain golden warmth without oversaturating reds. During the “blue hour” just after sunset, cooler settings (6000–7500K) enhance twilight’s ethereal hues. For mixed lighting scenarios—such as cityscapes under streetlights and dusk skies—layer bracketed WB adjustments or use graduated filters to balance disparate color temperatures within a single frame.
Adjusting White Balance for Weather Conditions
Overcast skies, fog, and storms introduce unique challenges. Cloud cover often emits a cooler light (6500K+), which can make skies appear flat or murky if uncorrected. Using the “Cloudy” preset (~6000K) adds subtle warmth to revive muted blues and emphasize texture in the clouds. Conversely, snowy landscapes benefit from slightly lower Kelvin values (5000–5500K) to prevent excessive blueness. For dramatic storm photography, manually dialing in cooler temperatures (7000K+) enhances the ominous gray tones of turbulent skies while preserving realism.
Using Custom White Balance for Precise Sky Tones
For ultimate control, create a custom white balance by photographing a neutral gray or white card under the same lighting as your scene. This method overrides presets and accounts for mixed light sources—crucial for twilight or urban environments. After setting a custom WB, revisit the same location under changing conditions; a setting that works at dawn may not suit midday. Pair this technique with spot metering to ensure the sky’s exposure doesn’t override your color adjustments, especially in high-contrast scenes.
Post-Processing Tips for Natural Skies
Even with perfect in-camera settings, subtle tweaks in post can elevate sky realism. Use the eyedropper tool in Lightroom or Capture One to sample a neutral cloud or gray area, automatically correcting color casts. For localized adjustments, gradient filters or luminosity masks allow selective WB shifts in the sky without affecting the foreground. Reduce blue or purple saturation sliders slightly if highlights appear unnatural. Remember: the goal is subtlety. Overprocessed skies often look digital, losing the nuanced gradients that define natural light.
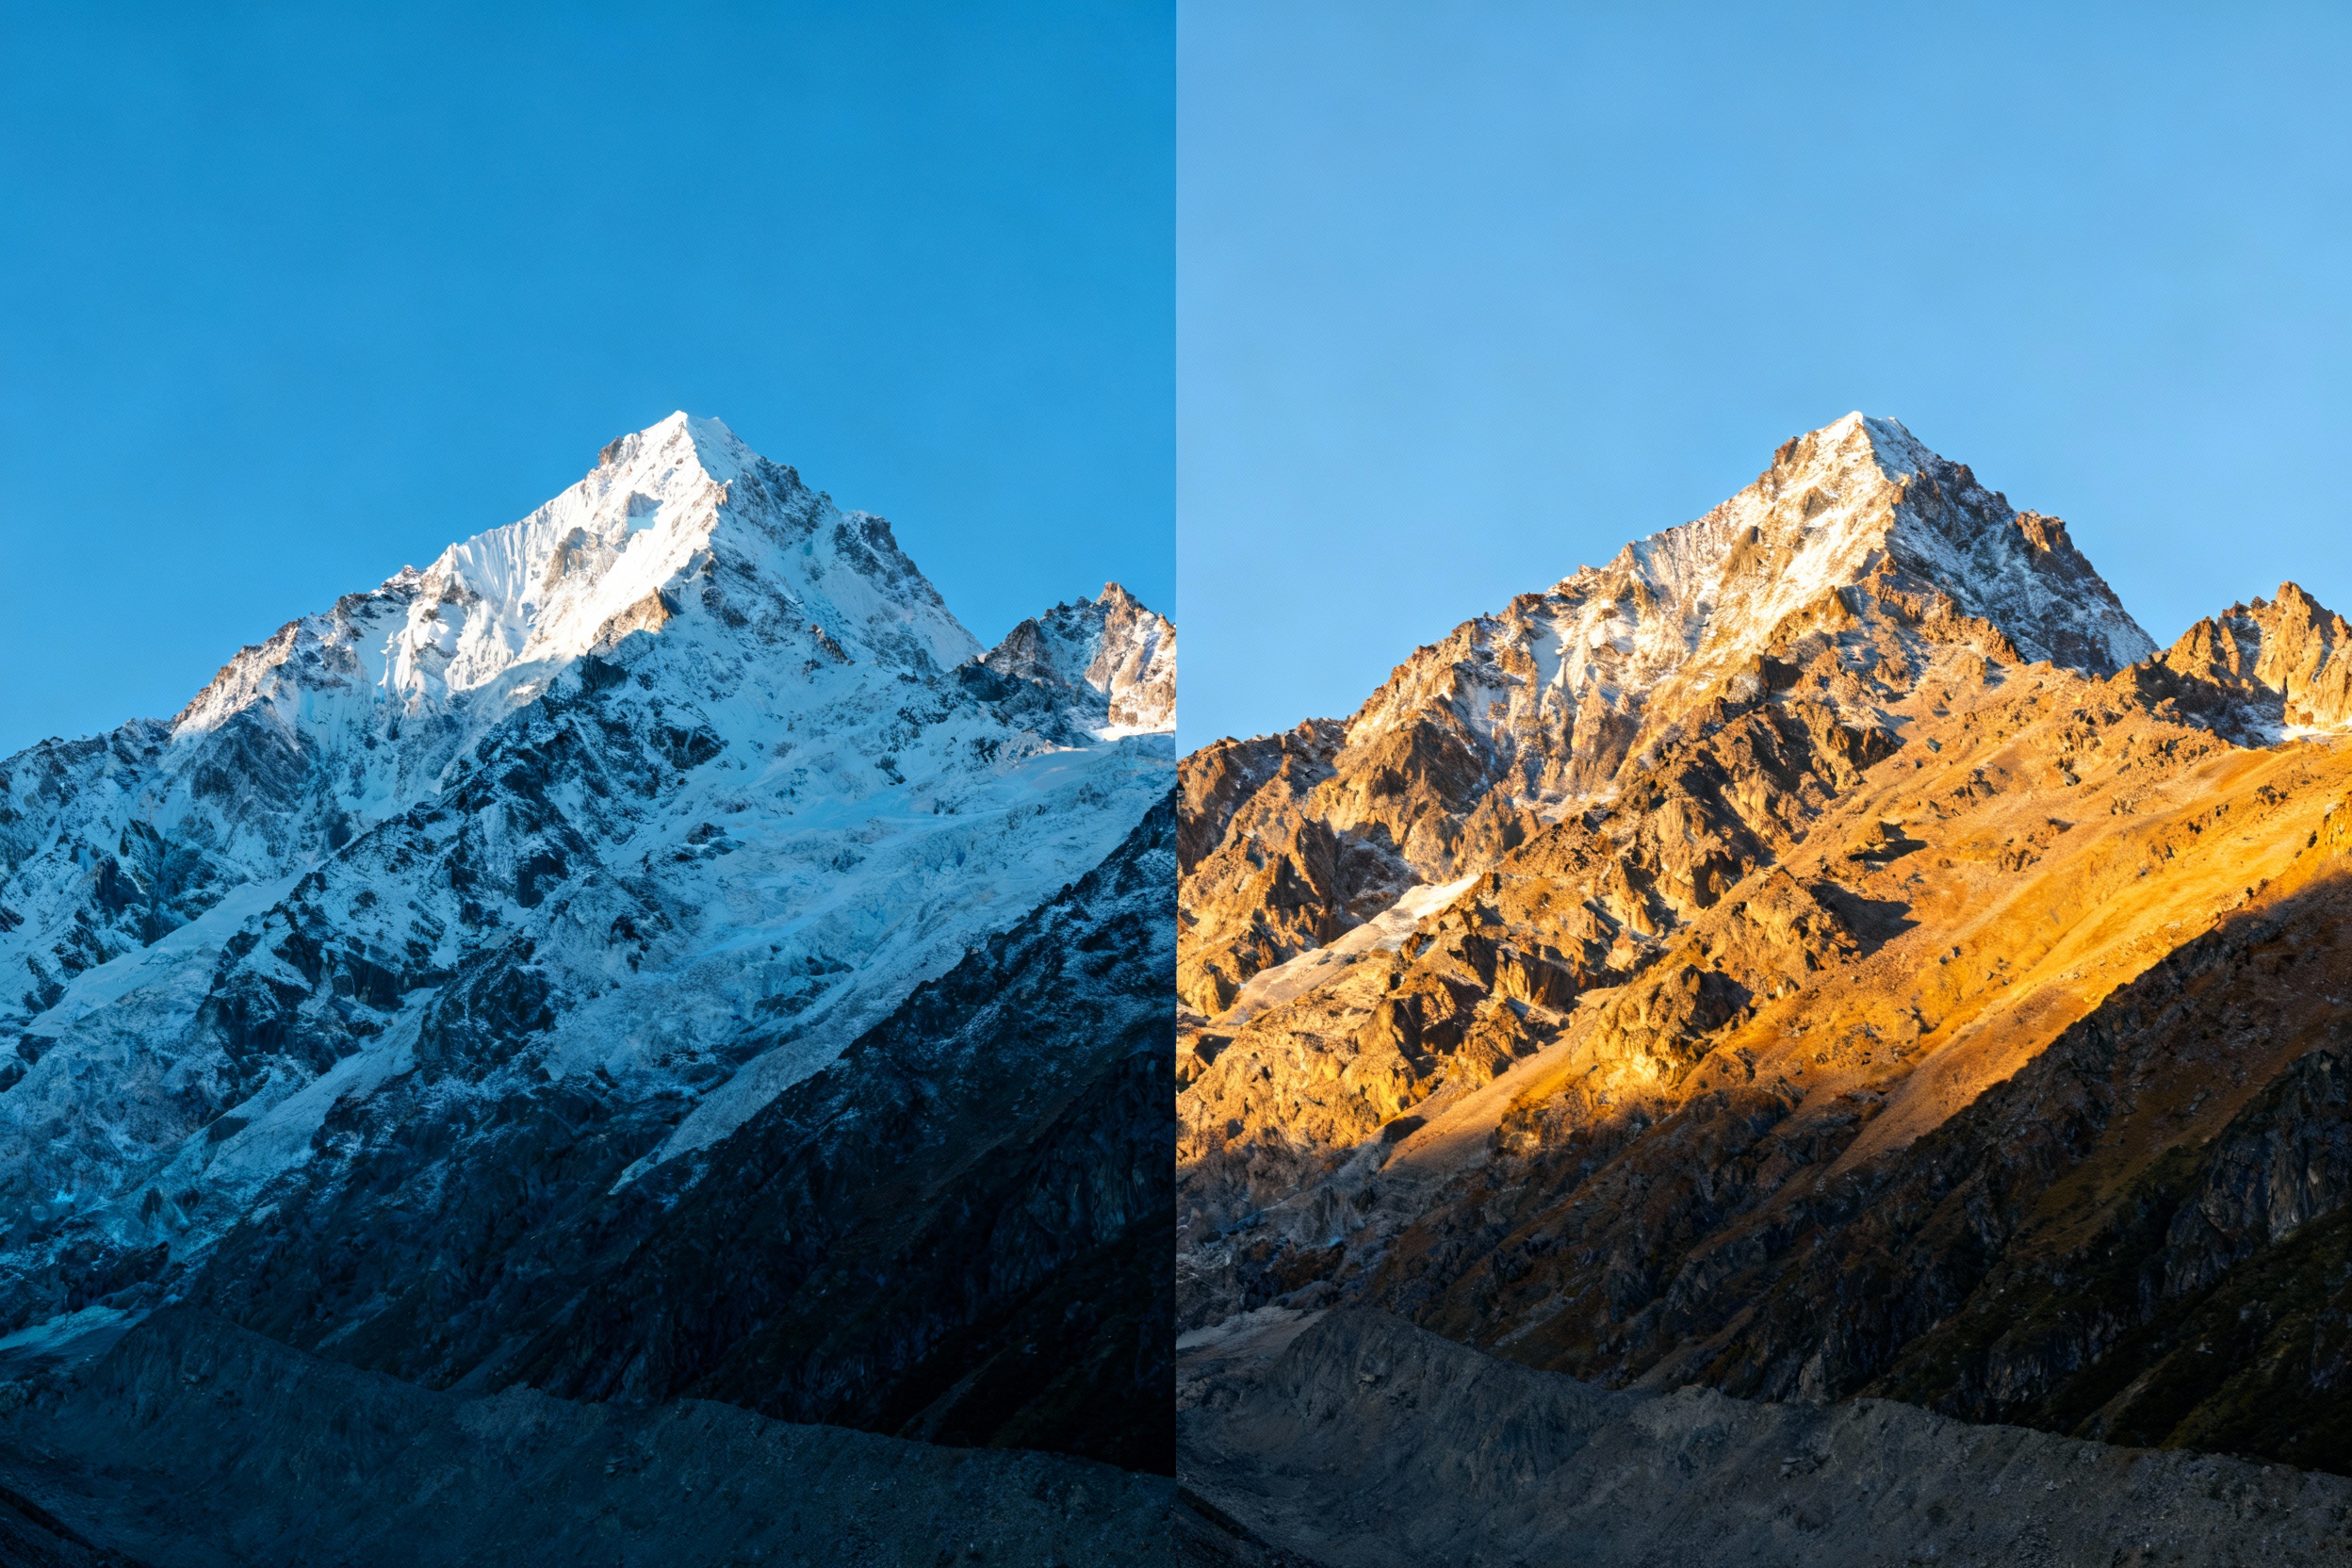
Real-World Examples: Before and After White Balance Adjustments
Consider a seascape shot at dusk with AWB: the raw file appears teal and overly cool. By adjusting to 4800K and tinting +10 toward magenta, the sky reclaims its twilight purple, and the water reflects deeper blues. In another example, a midday desert scene shot at 5500K looks harsh; dropping to 5200K with a -5 tint reduces blue haze, making the sky appear crisper against sandstone cliffs. These micro-adjustments demonstrate how intentional WB choices create images that feel authentic, even when stylized.