Avoiding Star Trails: The 500 Rule Revised
```html
Understanding Star Trails and Why They Matter
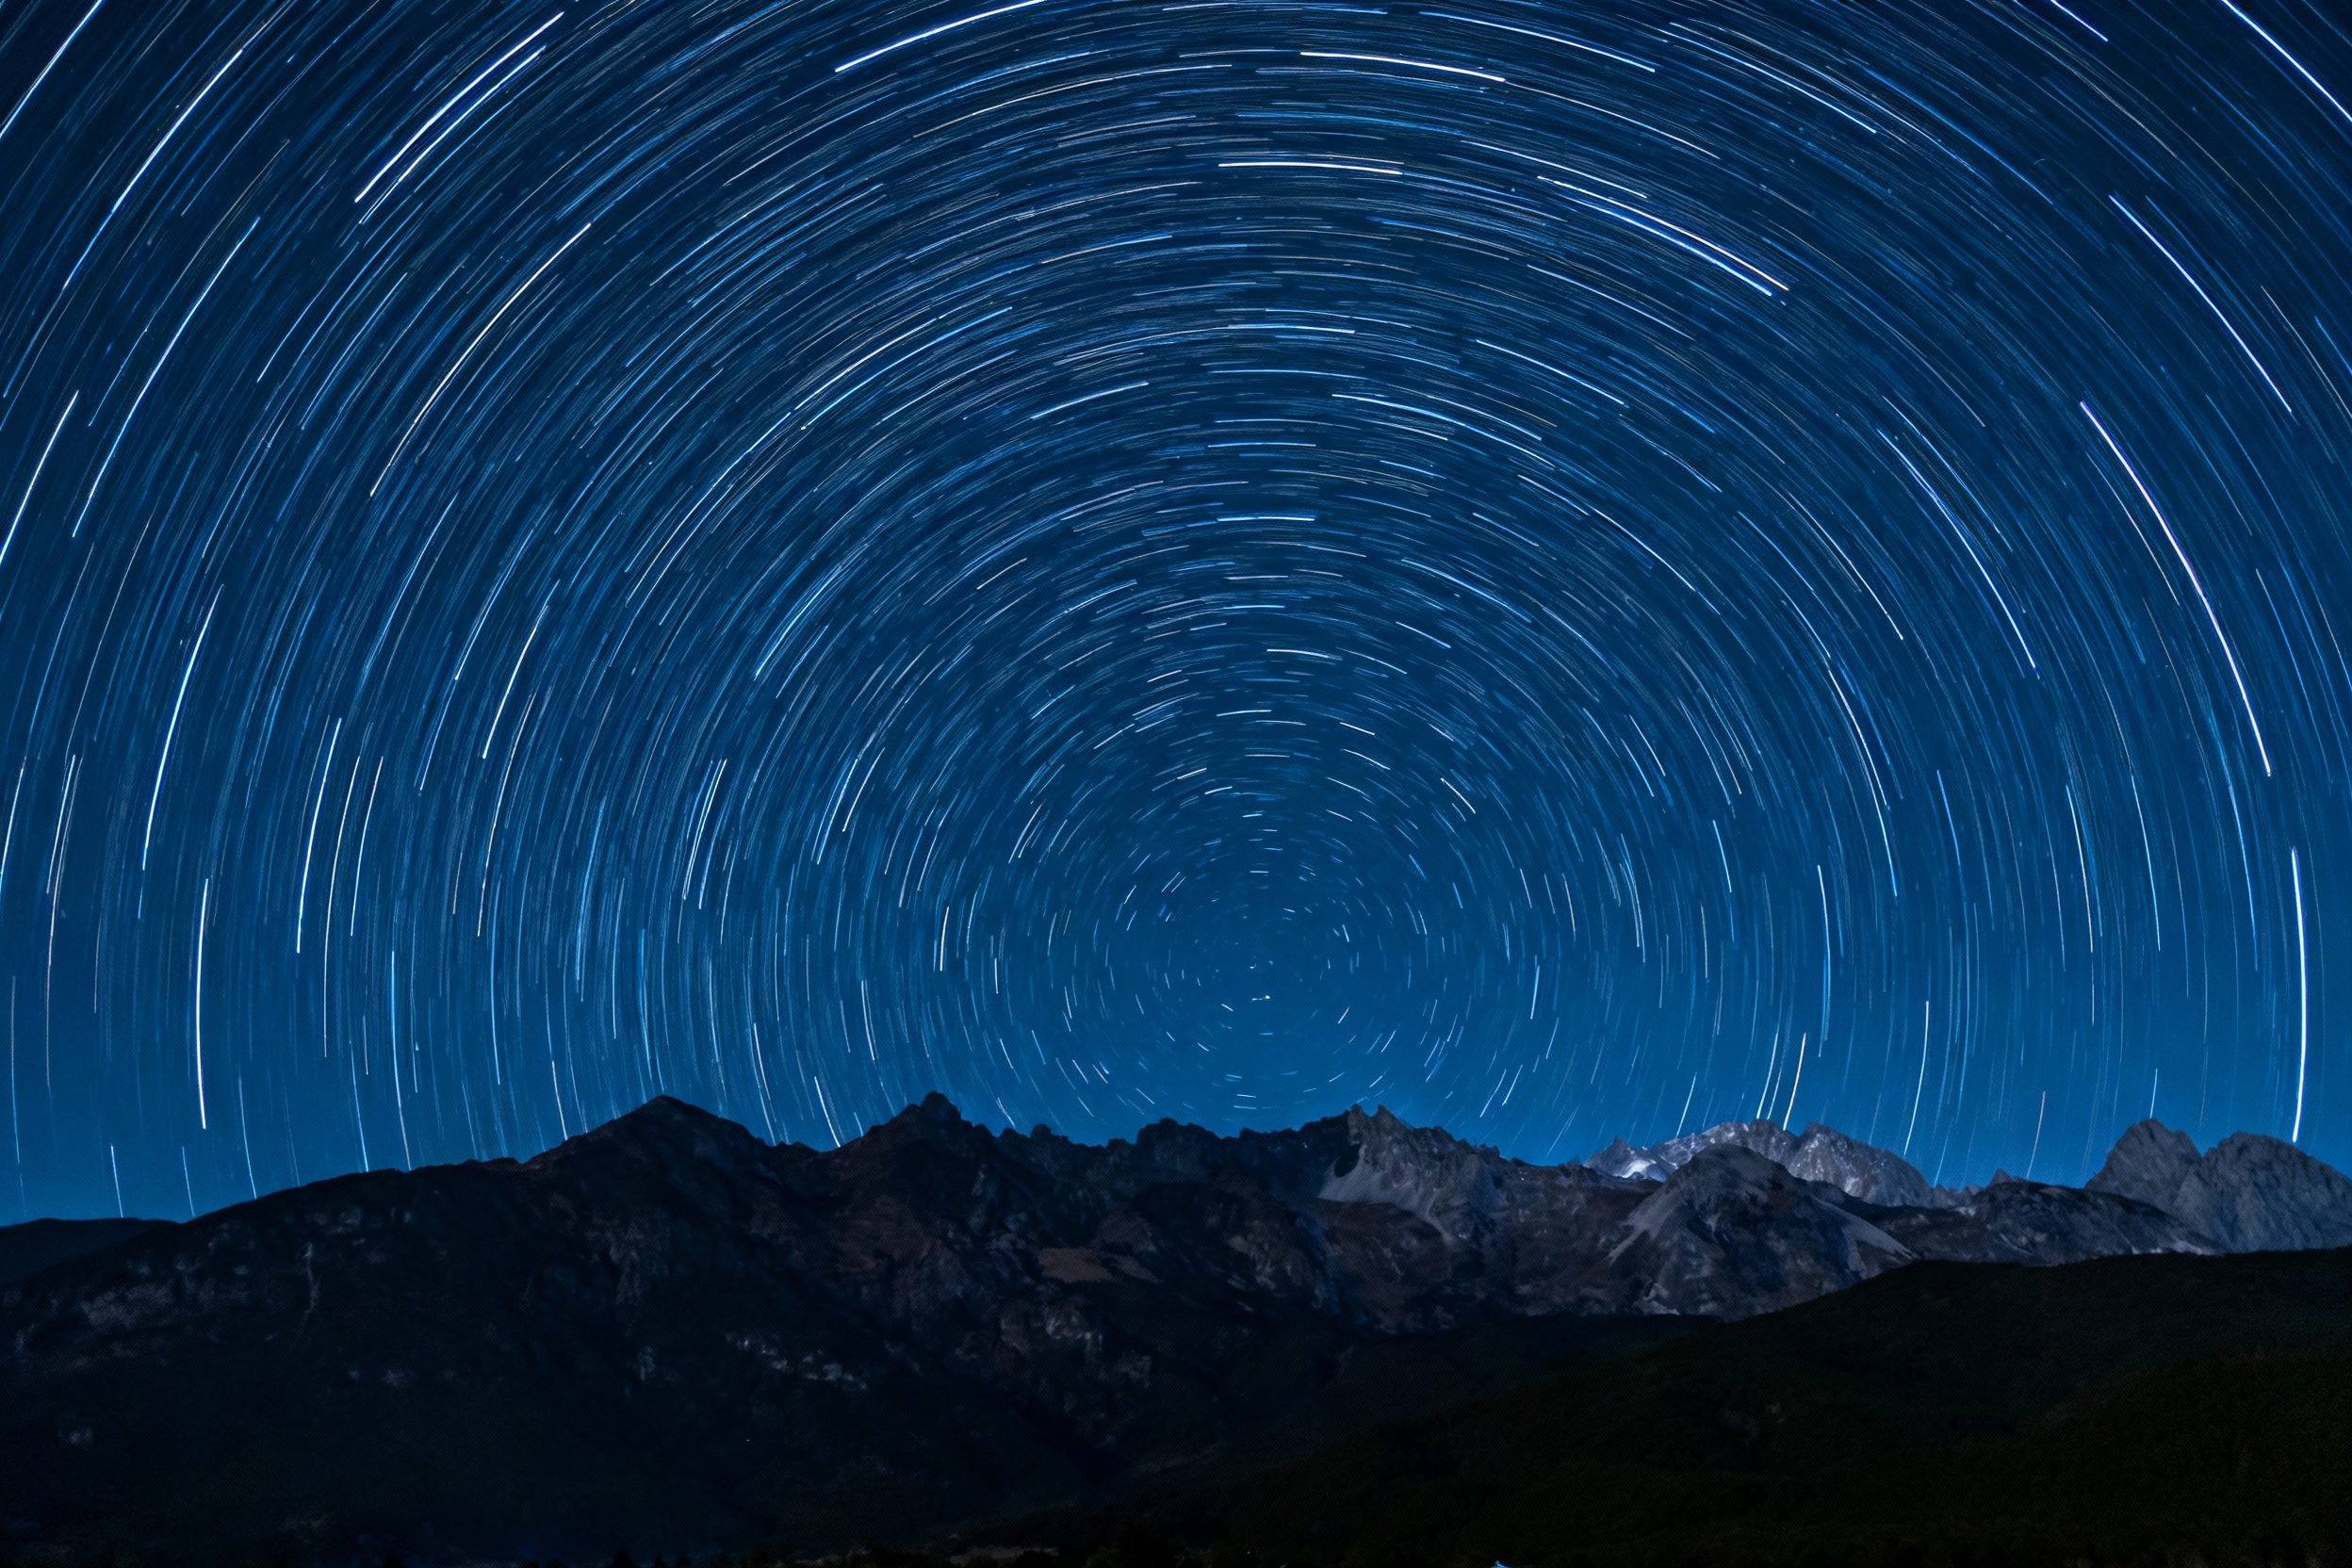
Star trails are mesmerizing arcs of light created by the Earth’s rotation, captured through long-exposure photography. While aesthetically striking, they’re often unintended in astrophotography where sharp, pinpoint stars are desired. Avoiding star trails is crucial for capturing images of constellations, the Milky Way, or meteor showers with clarity. The challenge lies in balancing exposure time to gather enough light without letting the stars blur—a delicate equilibrium influenced by factors like focal length, sensor size, and atmospheric conditions. This is where guidelines like the 500 Rule come into play, offering photographers a starting point to minimize motion blur.
The Original 500 Rule: A Quick Fix with Flaws
The traditional 500 Rule is a simplified formula: divide 500 by your lens’s focal length (in full-frame equivalent) to determine the maximum exposure time before stars begin to trail. For example, a 20mm lens would allow 25 seconds (500 ÷ 20 = 25). This rule became popular for its simplicity, enabling photographers to avoid complex calculations. However, it has significant limitations. Modern high-resolution sensors and variations in sensor crop factors (e.g., APS-C or Micro Four Thirds) render the rule less accurate. Additionally, it doesn’t account for declination—stars near the celestial poles move slower than those near the equator. These oversights can lead to disappointing results for those striving for perfection.
Why the Traditional Rule Falls Short in Modern Astrophotography
As camera technology advances, the 500 Rule’s shortcomings become more apparent. High-megapixel sensors reveal star movement even within the rule’s suggested time, especially when images are cropped or printed large. Crop sensors further complicate calculations: a 24mm lens on an APS-C camera (1.5x crop) behaves like a 36mm lens, reducing the allowable exposure to just 14 seconds—a drastic cut that may underexpose the scene. Moreover, the rule assumes ideal conditions, ignoring light pollution, aperture settings, and ISO noise, which affect exposure choices. Photographers chasing pinpoint stars often find themselves needing a more nuanced approach tailored to their gear and environment.
The Revised 500 Rule: Precision for Pinpoint Stars
The revised 500 Rule addresses these gaps by incorporating sensor size and pixel density. The formula becomes: (500 ÷ focal length) × crop factor. For a 20mm lens on an APS-C camera, this means (500 ÷ 20) × 1.5 = 37.5 seconds—a more generous window than the traditional rule. Some argue for an even stricter “400 Rule” or “300 Rule” to compensate for higher resolutions. Tools like mobile apps (e.g., PhotoPills) now factor in declination, allowing longer exposures near the poles. Testing is key: take multiple shots at varying exposures and zoom in to 100% to check for trails. This tailored approach ensures sharper results across diverse setups.
Putting Theory into Practice: A Step-by-Step Guide
Start by calculating your revised maximum exposure. For a full-frame camera with a 24mm lens: 500 ÷ 24 ≈ 21 seconds. On a crop sensor (1.6x), it becomes 21 × 1.6 ≈ 34 seconds. Use a sturdy tripod and a remote shutter to minimize vibrations. Set ISO between 1600-6400 (adjust based on noise tolerance) and open the aperture to its widest (e.g., f/2.8). Take a test shot and inspect stars at 100% zoom. If trails are visible, reduce exposure by 5-second increments. For post-processing, stack multiple short exposures using software like Sequator or Starry Landscape Stacker to reduce noise while keeping stars sharp. This method combines technical precision with creative experimentation.
Beyond Exposure Time: Advanced Techniques for Crisper Skies
For those seeking perfection, invest in a star tracker—a motorized mount that counteracts Earth’s rotation, enabling exposures of several minutes. Trackers like the iOptron SkyGuider Pro allow detailed shots of nebulae and galaxies. Alternatively, use image stacking: capture 30+ short exposures and align them in software to average out noise and enhance detail. Wide-angle lenses (14-24mm) and fast apertures (f/1.4-f/2.8) help gather more light quickly. Don’t forget light pollution filters if shooting near cities. Pair these tools with the revised 500 Rule, and the night sky’s wonders become vividly accessible.
Embracing Technology: The Future of Astrophotography
Emerging technologies are revolutionizing astrophotography. AI noise reduction tools like Topaz Denoise AI or DxO PureRAW clean up high-ISO images without sacrificing detail. Smartphones with computational photography, such as Google Pixel’s Astro Mode, now rival DSLRs by blending multiple exposures automatically. Mirrorless cameras with real-time exposure previews let photographers adjust settings on the fly. Looking ahead, advancements in sensor sensitivity and AI-driven stacking algorithms will democratize pristine astrophotography, making it easier for enthusiasts to capture the cosmos with unprecedented clarity—no math required.