Balancing DSLR Payloads on Trackers
```html
Understanding the Importance of Balancing DSLR Payloads
Balancing a DSLR on a tracker is a critical yet often overlooked aspect of astrophotography and time-lapse photography. A properly balanced payload reduces strain on the tracker's motors, minimizes vibrations, and ensures smoother, sharper images. When a camera is off-balance, even slightly, it can lead to tracking errors, blurred shots, and potential damage to equipment over time. Imagine capturing the perfect Milky Way shot only to find star trails caused by an unstable setup—avoidable with careful balancing.
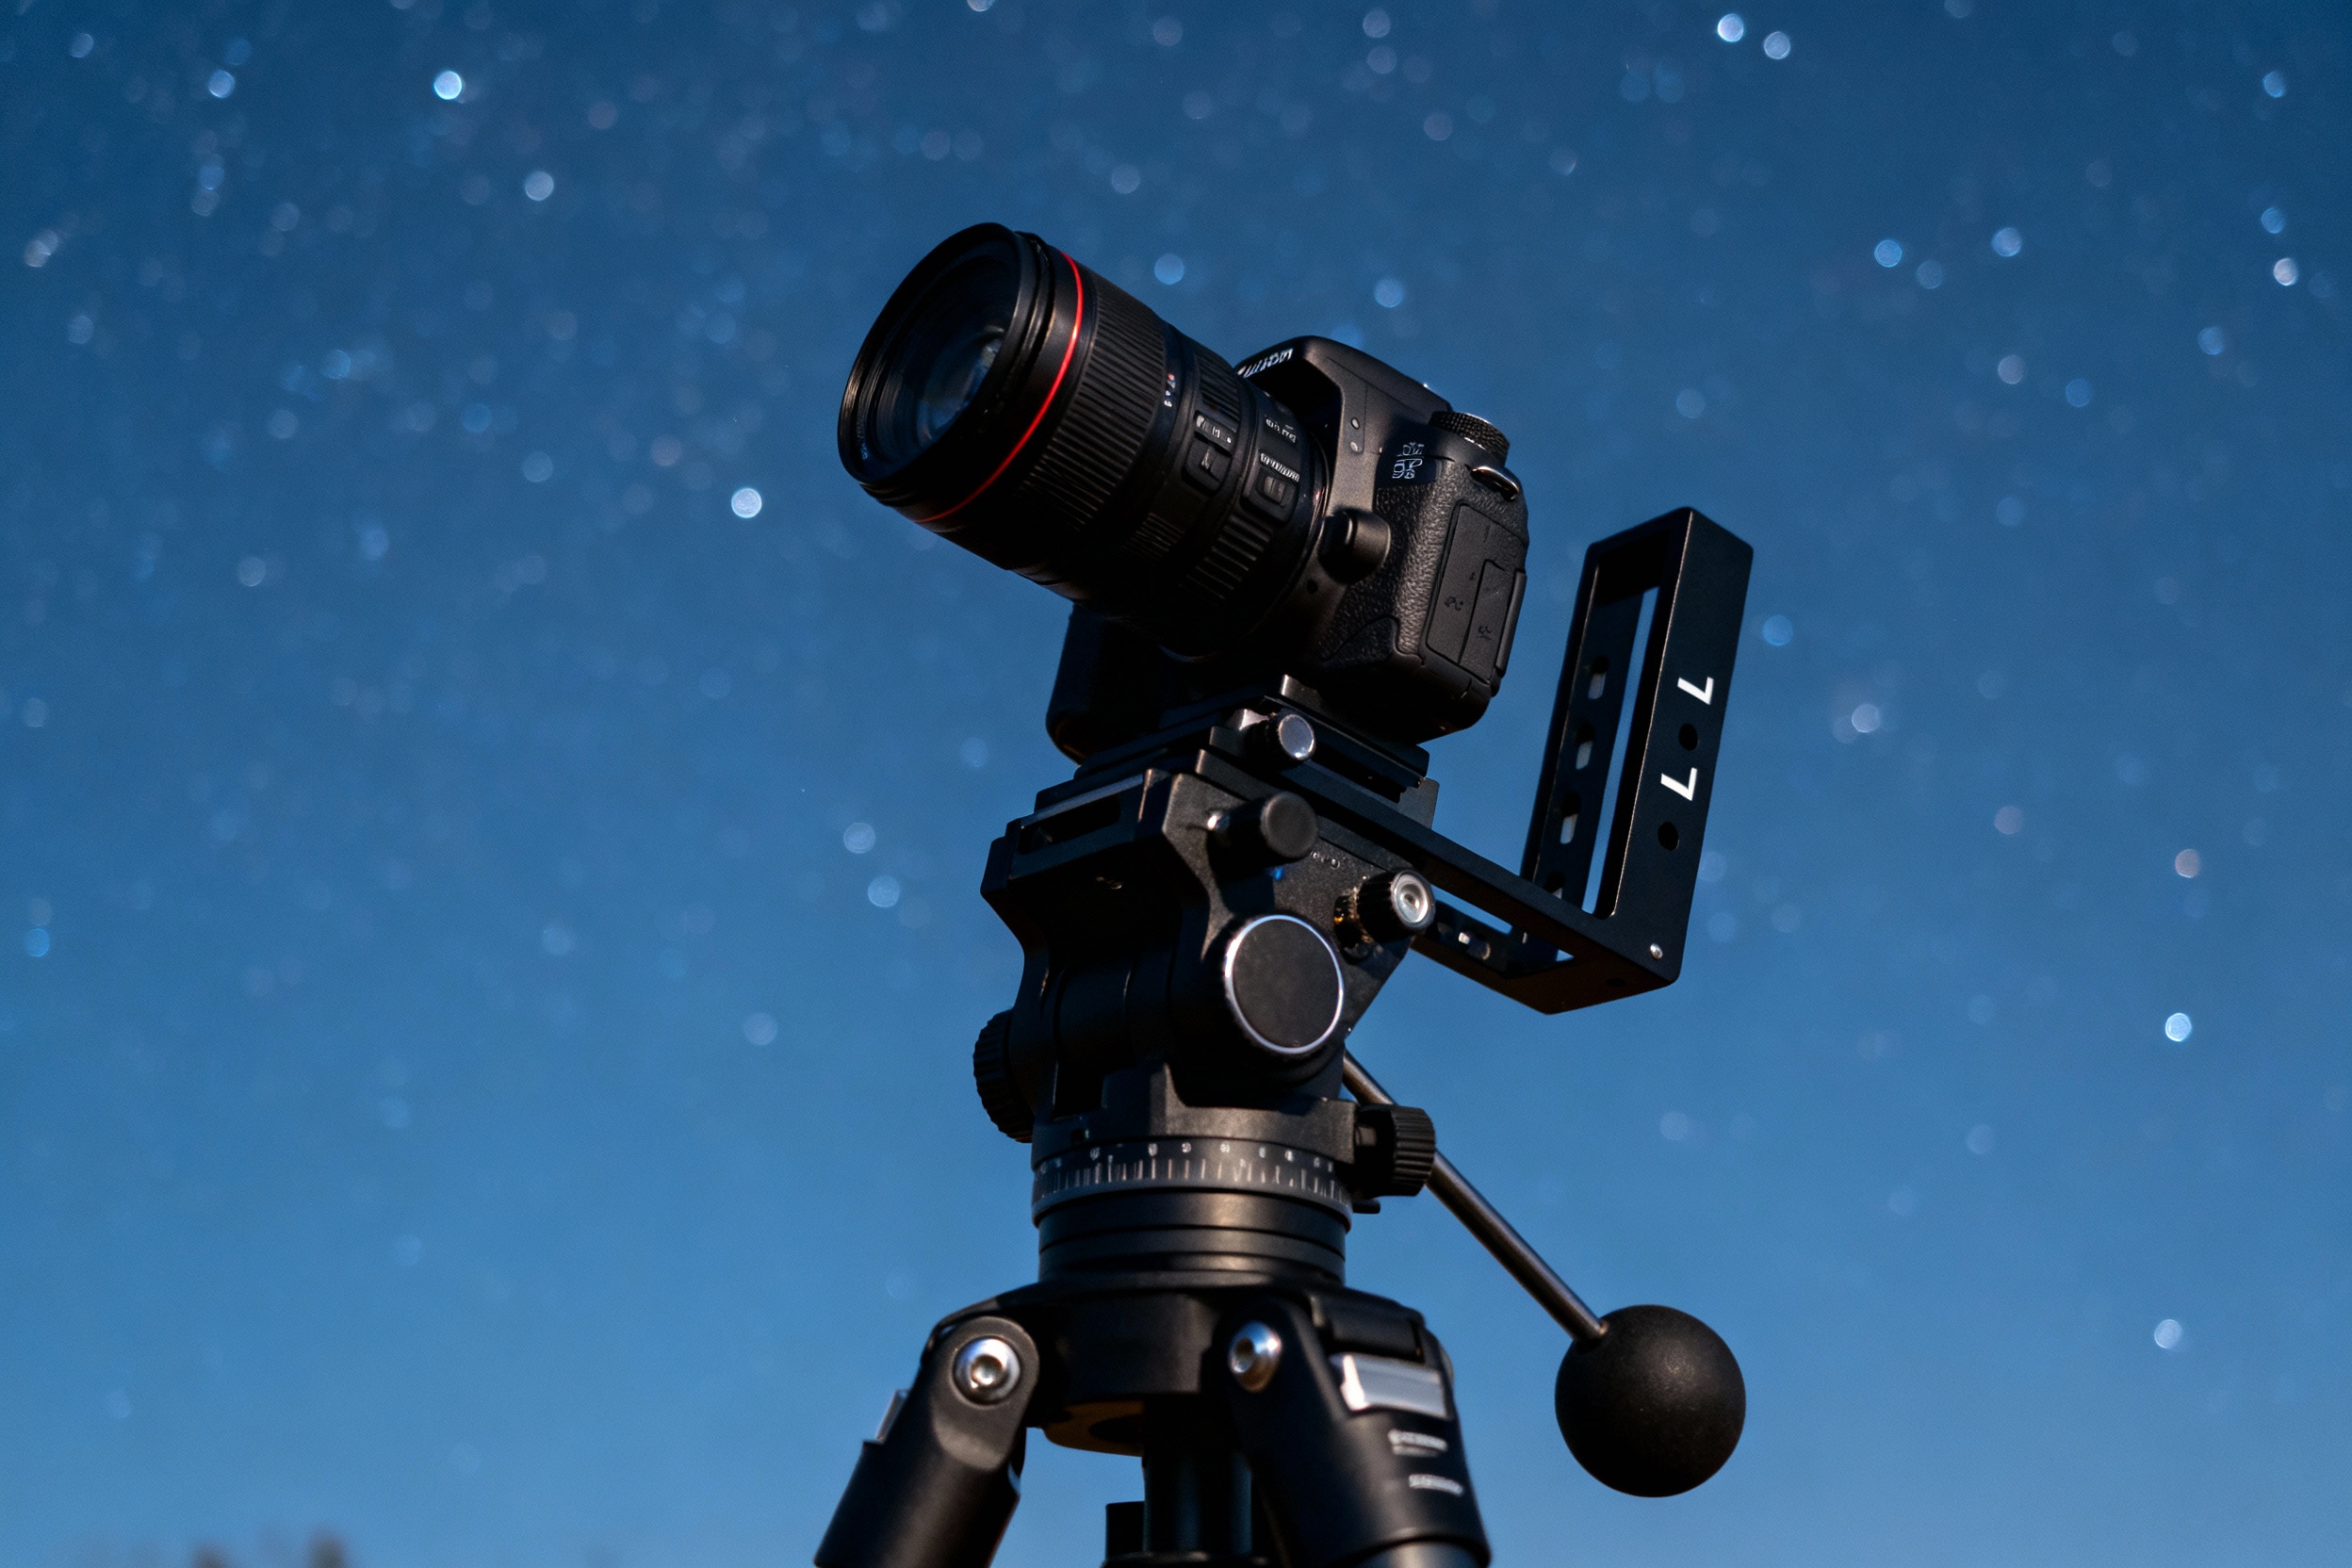
Components of a Tracker System and Their Roles
A typical tracker system includes the mount head, tripod, counterweights, and camera mount. Each component plays a role in achieving equilibrium. The mount head’s declination and right ascension axes must move freely without resistance, while the tripod provides a stable base. Counterweights offset the camera’s weight, and the camera mount (often an L-bracket) positions the DSLR. For example, a heavier lens may require additional counterweights or a longer dovetail bar to shift the center of gravity. Understanding these parts helps troubleshoot imbalances before they affect your shots.
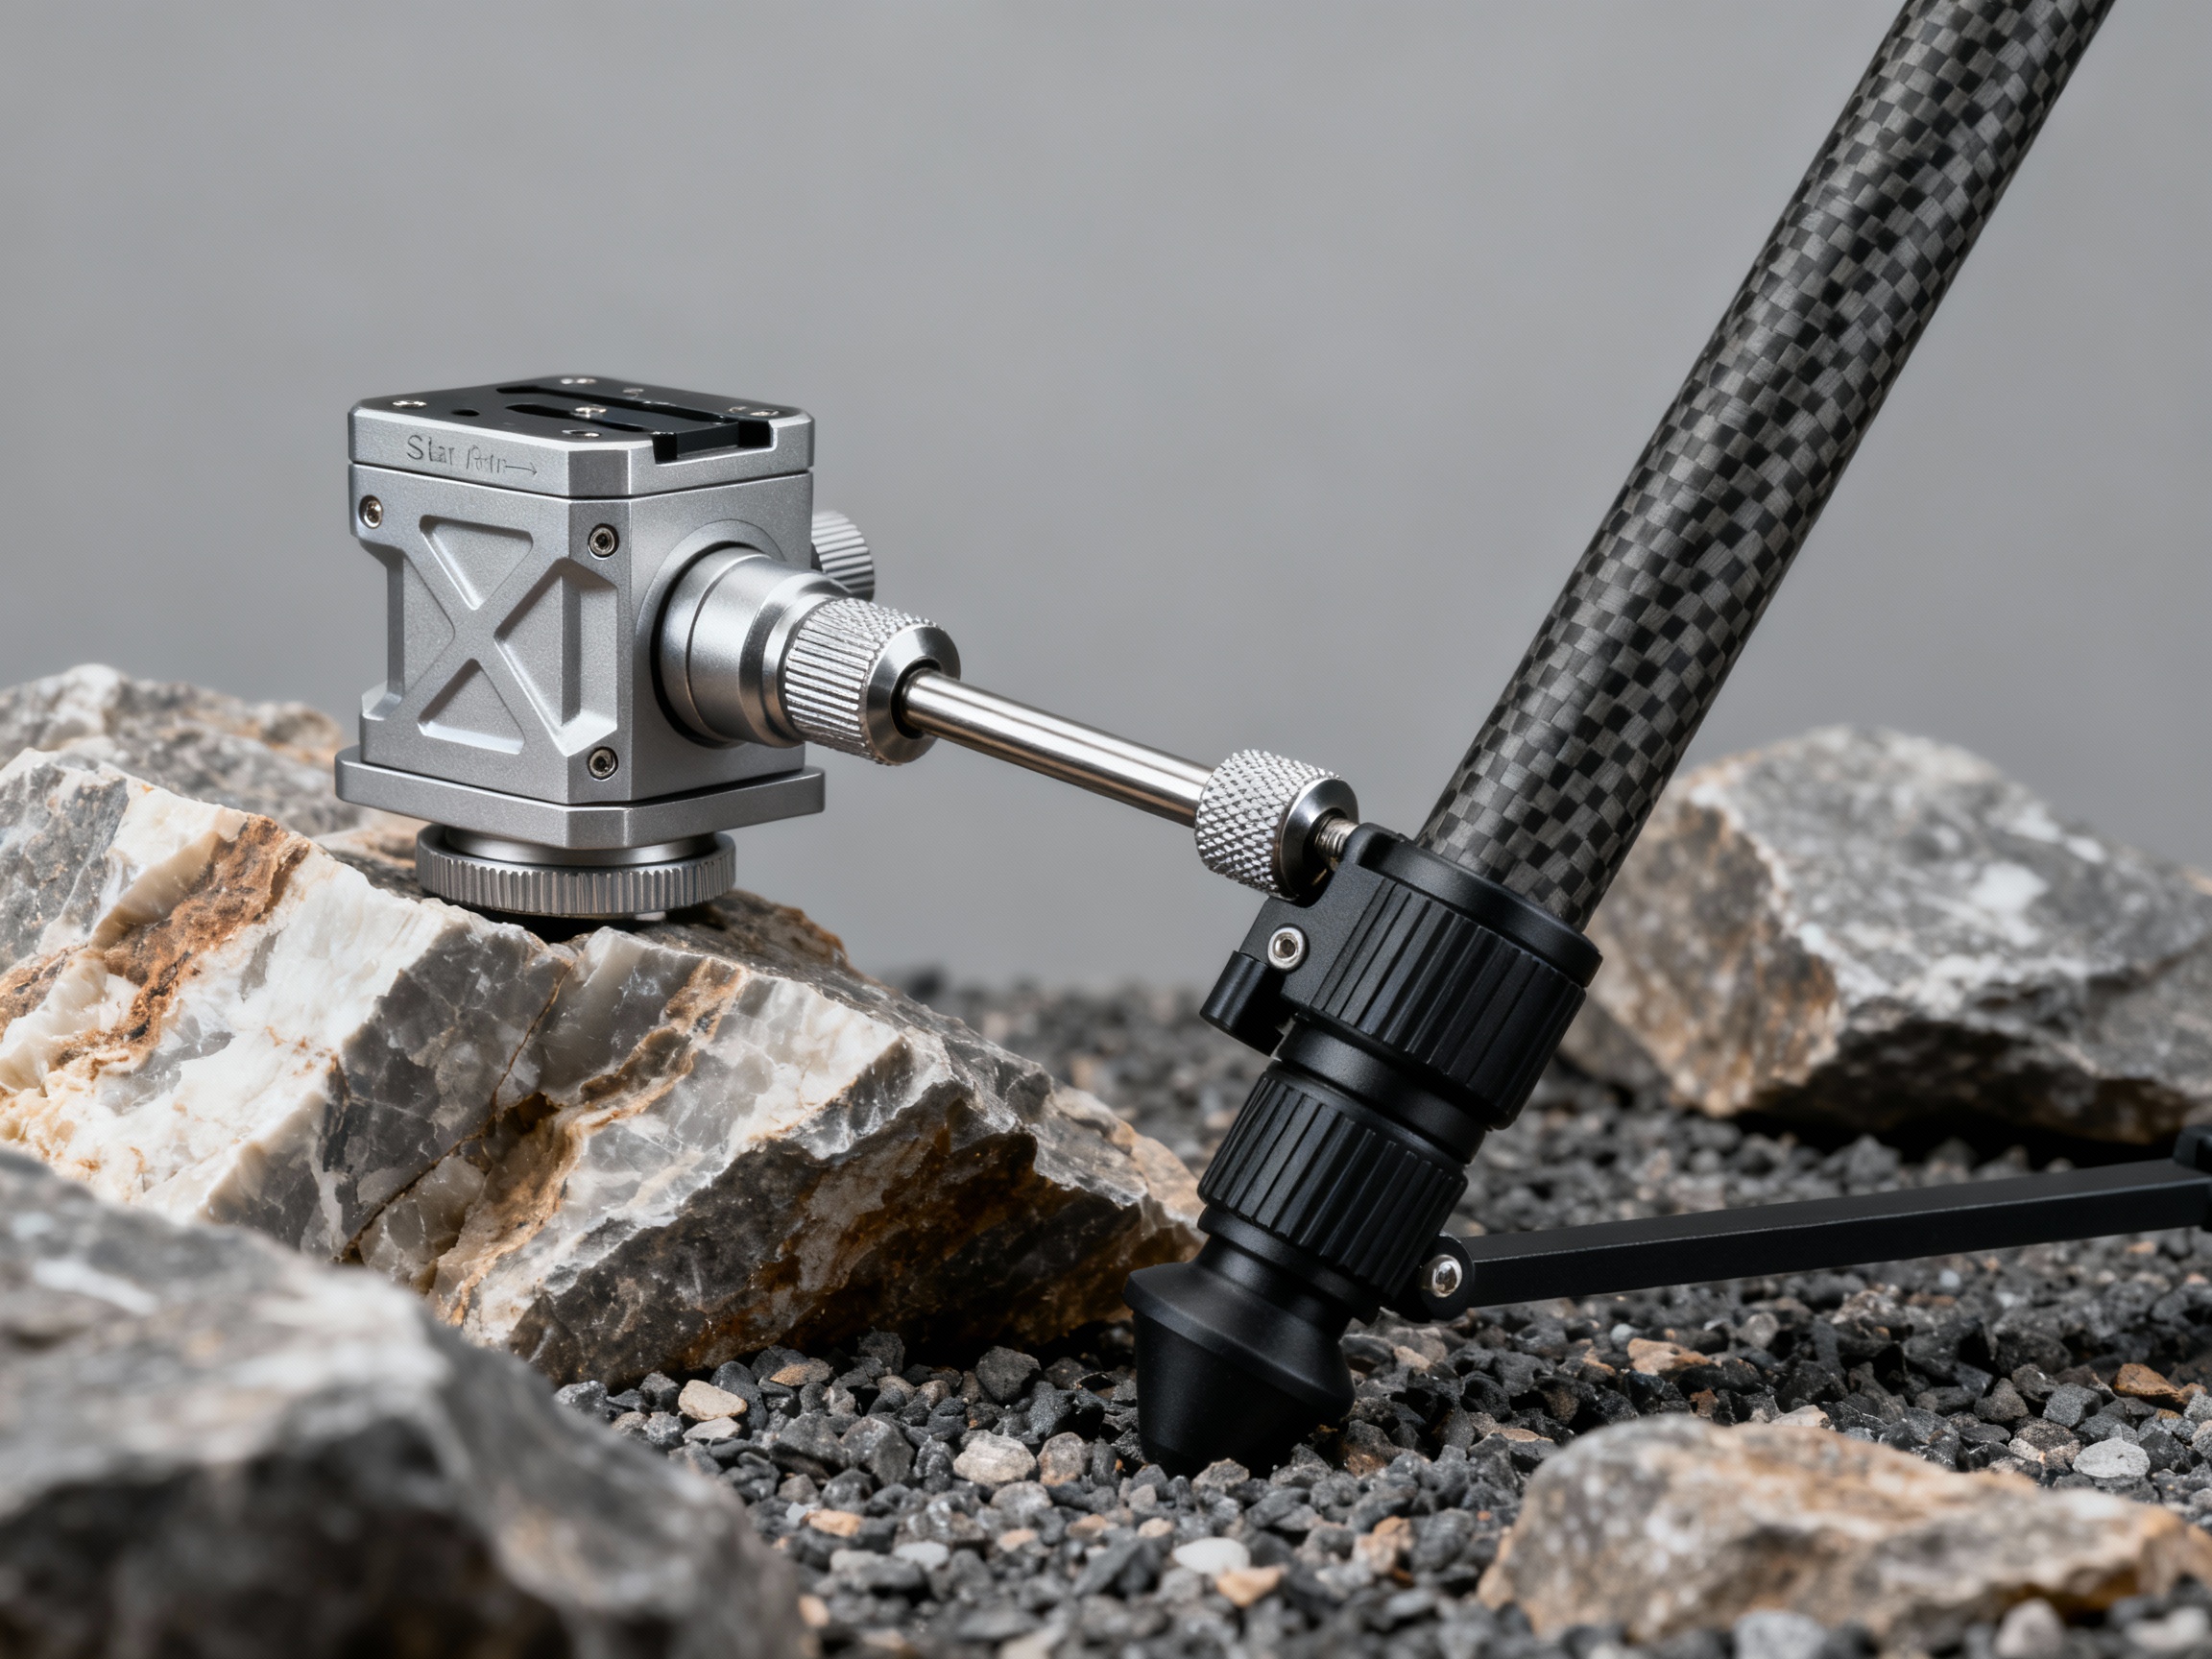
Choosing the Right Mount and Counterweight Setup
Selecting compatible hardware is essential. Trackers have payload limits—exceeding them risks motor burnout. For a DSLR with a 200mm lens, a mid-range tracker with 5-10 lb capacity may suffice, while telephoto lenses demand heavier-duty models. Counterweight kits should match the tracker’s shaft diameter, and adjustable plates allow fine-tuning. Pro tip: Use a spirit level to ensure the tracker is perfectly horizontal before attaching the camera. This small step prevents skewed balance from the start.
Step-by-Step Balancing Techniques for Stability
- Attach the camera to the mount and loosen the axes.
- Rotate the declination axis: if the camera tilts, adjust the position or add weights.
- Repeat for the right ascension axis, ensuring smooth rotation without drift.
- Test by nudging the setup gently—it should recenter itself.
Balancing in both axes is non-negotiable. A common mistake is focusing solely on one axis, leading to uneven stress distribution.
Dynamic Balancing for Moving Shots
When shooting panoramas or tracking celestial objects, payload balance shifts as the tracker moves. Dynamic balancing involves anticipating these shifts. For example, when the tracker rotates east to west, the camera’s weight distribution changes relative to the mount. Use a sliding plate to recenter the payload mid-shoot or employ auto-guiding systems to compensate electronically. This proactive approach is key for multi-hour exposures.
Testing and Fine-Tuning Your Setup
After initial balancing, conduct a dry run. Capture a series of test shots at high ISO to quickly review star sharpness. Software like PHD2 Guiding can analyze tracking errors and pinpoint imbalances. Small tweaks—like shifting the camera 1cm forward—can resolve issues. Record your adjustments in a notebook; over time, patterns emerge that streamline future setups.
Common Mistakes and How to Avoid Them
Top errors include ignoring payload limits, uneven terrain setup, and forgetting to recheck balance after swapping lenses. For instance, attaching a 70-200mm zoom after using a prime lens shifts the center of gravity. Always rebalance when changing gear and use a portable bubble level for uneven ground. A checklist saved on your phone ensures no step is missed in the field.
Case Studies: Real-World Balancing Scenarios
Case 1: A photographer shooting the Northern Lights in Iceland used too light a counterweight, causing jerky motion. Adding a second counterweight smoothed the motion. Case 2: A wildlife photographer adapted tracker balancing techniques for a gimbal, achieving buttery-smooth pans. These examples show the universality of proper payload management.
Future Innovations in Tracker Technology
Emerging tech like AI-driven auto-balancing and carbon fiber counterweights promises to simplify setups. Imagine a tracker that uses gyroscopes to detect imbalance and adjusts counterweights autonomously. Such advancements could make manual balancing obsolete, but for now, mastering the basics remains invaluable.