Focusing on Stars Using Live View
Understanding Live View and Its Role in Astrophotography
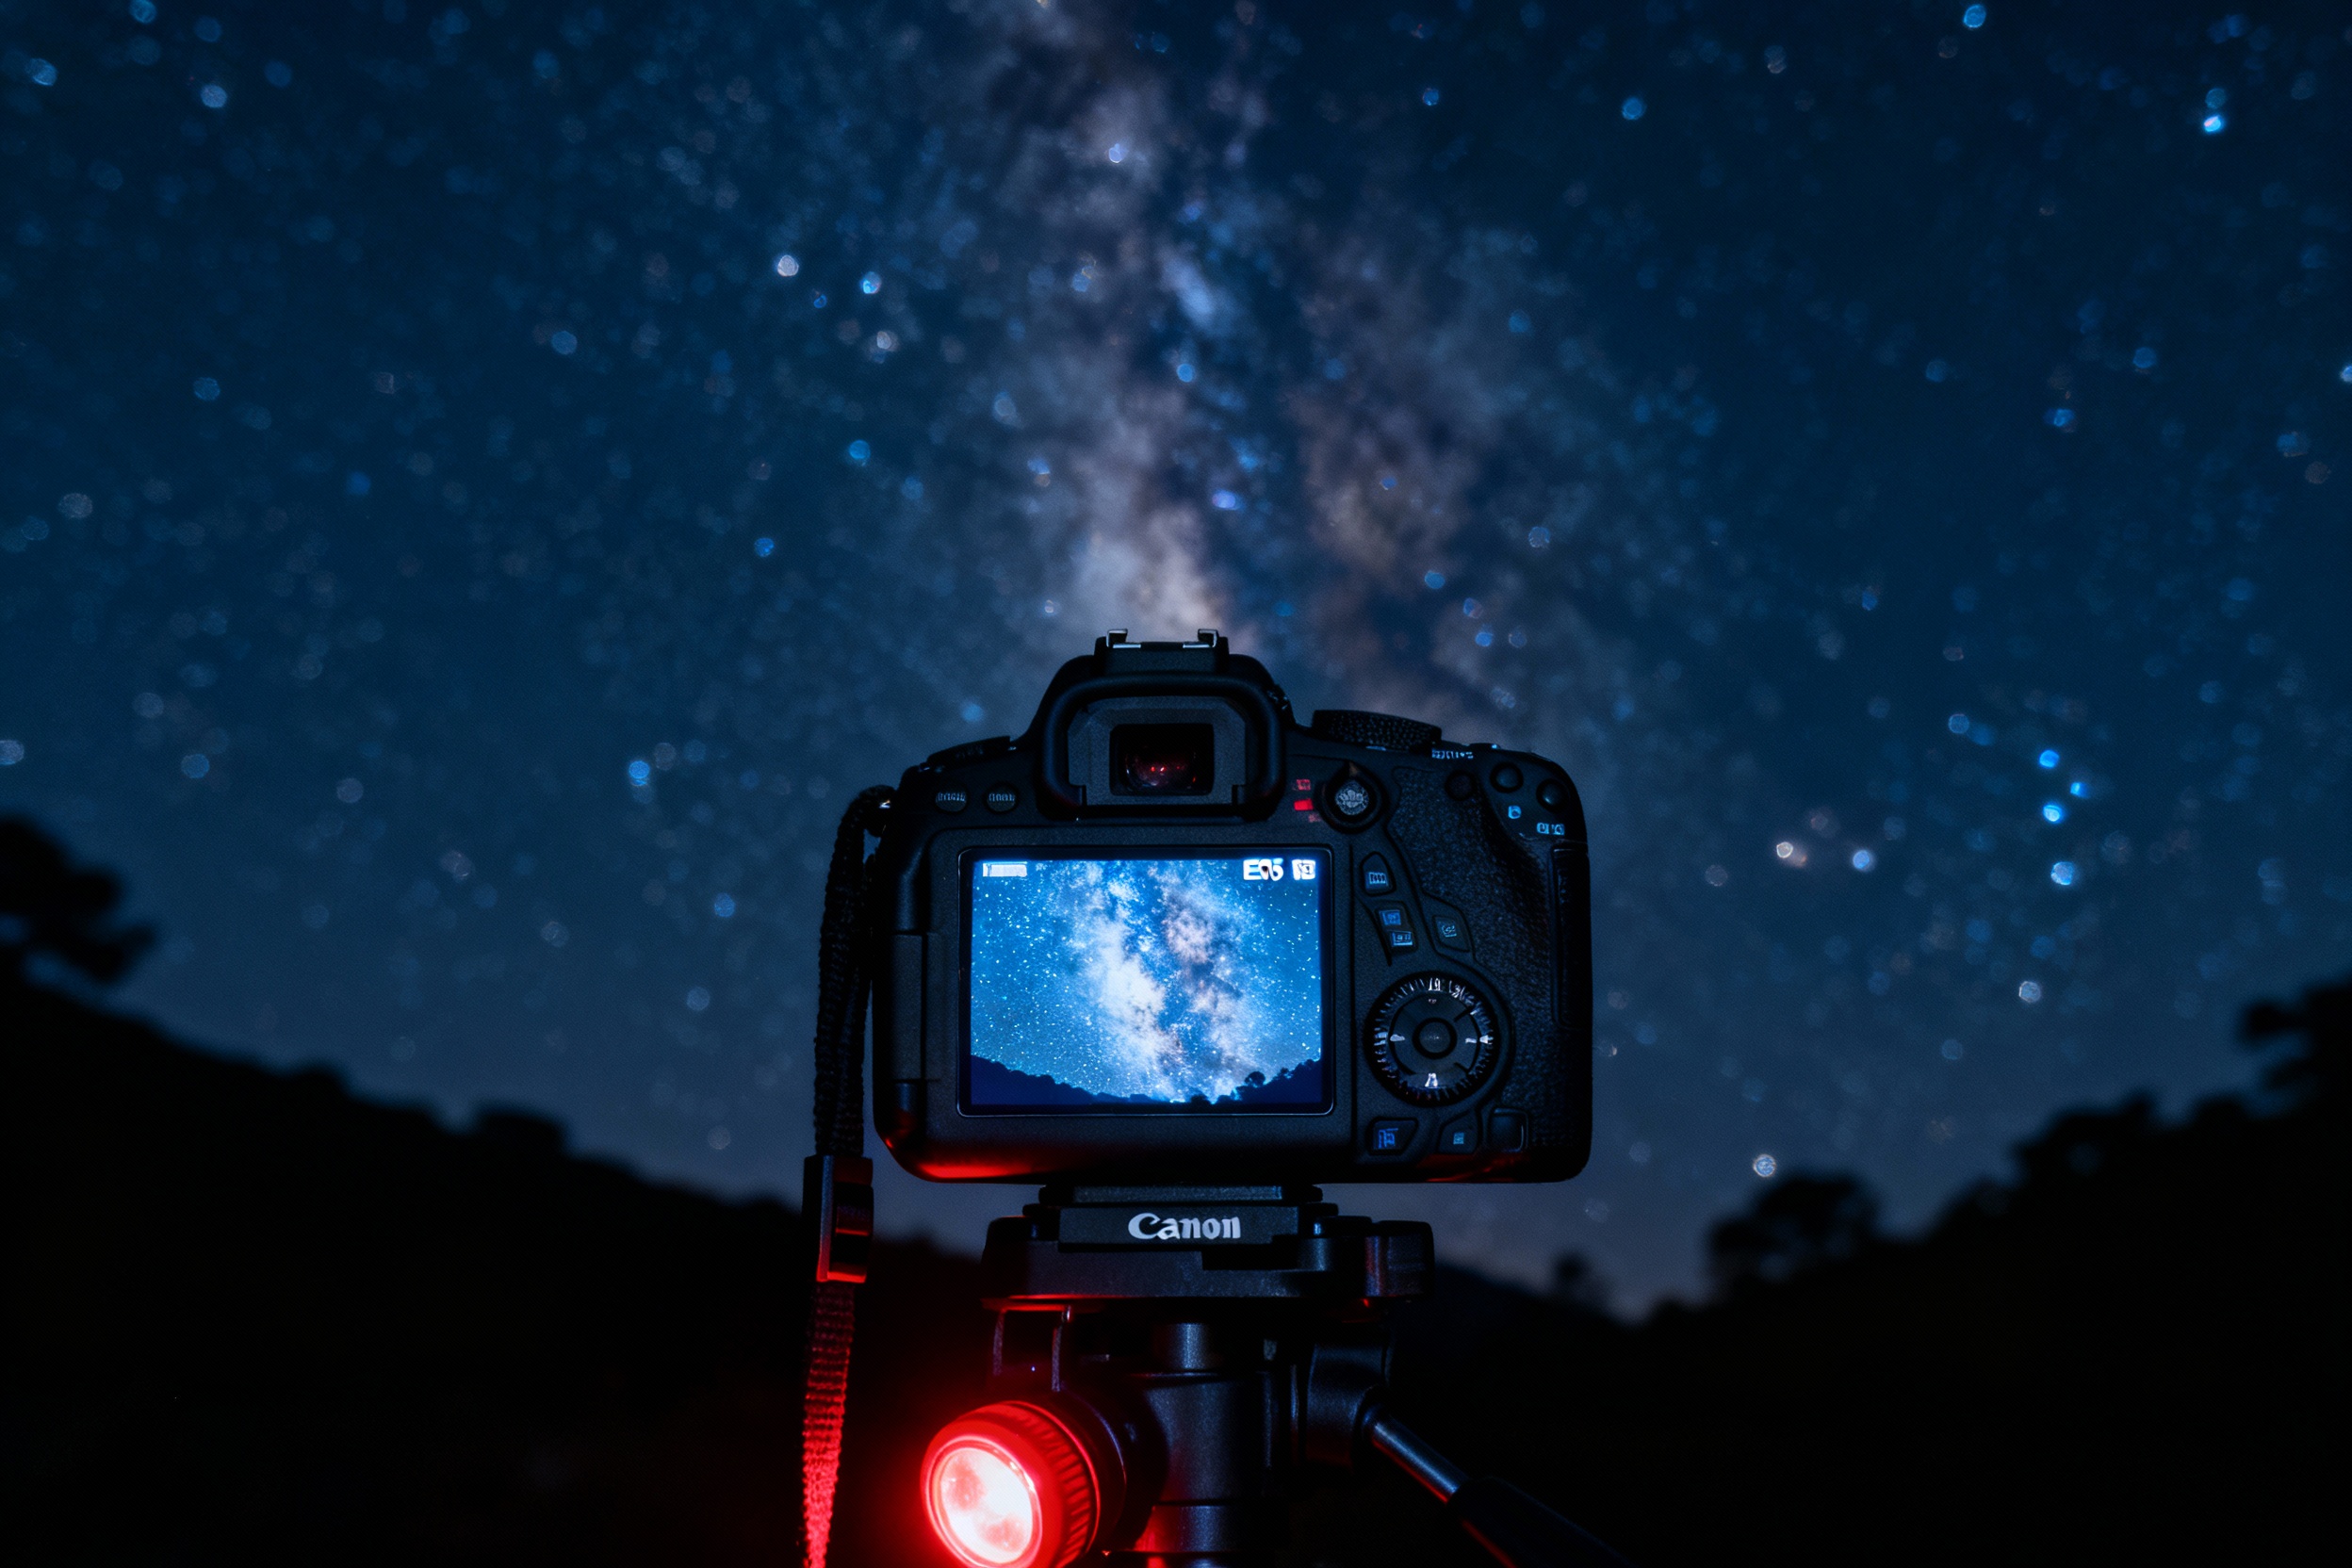
For photographers chasing the perfect shot of the night sky, achieving sharp focus on stars is a constant challenge. Traditional optical viewfinders often fall short in low-light conditions, leaving users squinting at dim, fuzzy points of light. Enter Live View: a feature on modern DSLR and mirrorless cameras that transforms the rear LCD screen into a real-time preview of your scene. Unlike optical viewfinders, Live View utilizes the camera’s sensor to display an amplified, noise-reduced image, making it easier to distinguish stars against the dark sky. This tool isn’t just a convenience—it’s a game-changer for pinpointing celestial details.
The Science Behind Live View Focusing
Live View’s effectiveness stems from its ability to leverage contrast-detection autofocus (AF) or manual focusing aids like magnification. When zoomed in digitally, even subtle changes in star brightness become apparent, allowing precise adjustments. The sensor’s readout also reduces optical aberrations caused by viewfinder misalignment or lens imperfections. Additionally, some cameras offer focus peaking in Live View, highlighting high-contrast edges (like stars) in vibrant colors. This combination of real-time feedback and enhanced visibility turns the abstract task of focusing into a tactile, controlled process.
Step-by-Step: Setting Up Your Camera for Live View
Begin by mounting your camera on a sturdy tripod to eliminate shake. Switch to Manual mode and open the lens aperture to its widest setting. Enable Live View and navigate to the magnification tool—often a button labeled with a magnifying glass. Zoom in 5x or 10x on a prominent star or planet. If using autofocus, select a single-point AF mode and aim the point at your target. For manual focus, rotate the lens ring slowly until the star contracts into the smallest possible point. Disable image stabilization to prevent unintended corrections during exposure.
Ideal Camera Settings for Star Focusing
Start with an ISO between 1600 and 6400 to brighten the Live View feed without overwhelming noise. Set exposure time to 10–15 seconds for preliminary test shots. Use a remote shutter or timer delay to minimize vibrations. If your camera supports it, enable “Exposure Simulation” in Live View to preview how settings affect the final image. For lenses with infinity markers, note that the true infinity focus point often lies just shy of the marked ∞ symbol—another reason Live View’s precision is invaluable.
Overcoming Common Challenges
Condensation on the lens, temperature-induced battery drain, and light pollution can sabotage Live View sessions. Carry hand warmers to combat fogging and spare batteries in insulated pockets. In bright environments, attach a light pollution filter or shoot during moonless nights. If stars still appear blurry despite perfect focus, check for tracking errors in your tripod head or atmospheric turbulence—sometimes, patience is the only fix.
Advanced Techniques: Stacking and Filters
Once focus is mastered, pair Live View with astrophotography techniques like image stacking. Take multiple exposures and blend them in software to reduce noise. Introduce a light pollution filter to enhance contrast or a graduated ND filter to balance foregrounds. For star trails, disable tracking and use Live View to compose Polaris at the center of your frame.
Post-Processing Your Live View Captures
Import images into Lightroom or Photoshop to fine-tune clarity and reduce chromatic aberration. Use the brush tool to selectively sharpen star edges or apply gradient masks to darken skies. For a natural look, avoid over-saturating blues and purples—subtlety preserves the night’s authenticity.
Inspiration: Iconic Astrophotography Examples
Study compositions by pioneers like Babak Tafreshi, who blends ancient landscapes with celestial events. Experiment with foreground elements—a lone tree, a mountain ridge—to add depth. Remember, Live View isn’t just a focusing aid; it’s a window to framing the cosmos with intention.